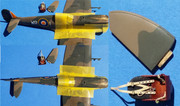
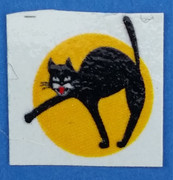
Inspired by the photo below which I found on the fantastic “SAAF WW2 Heritage Site” by Thinus le Roux. The early version of the 40 Squadron cat is what did it for me, not many reference photos out there.
This is my first build to be posted on any forum. So here we go.
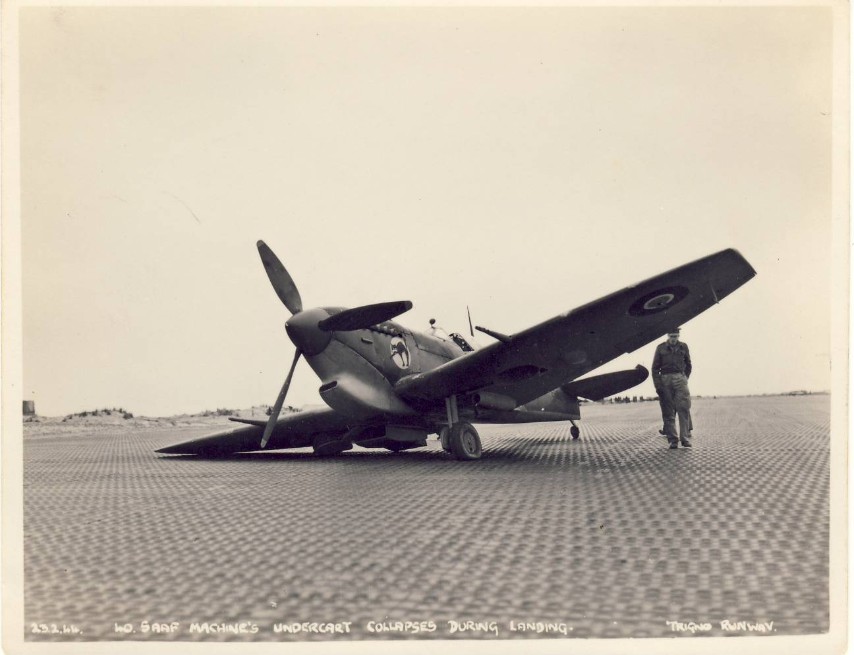
The incident above happened at Trigno Landing Ground where 40 Sqn. was based from December ’43 to March ’44. Trigno LG was near Vasto Italy and right next to the Adriatic Sea where the Trigno River enters it. Hence the runway and taxiway surfaces were PSP laid directly onto beach sand.
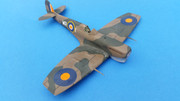
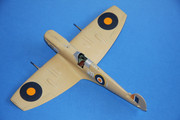
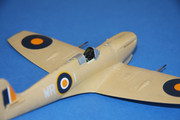
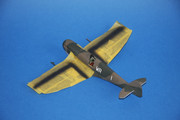
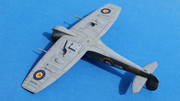
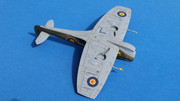
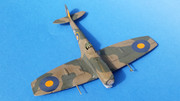
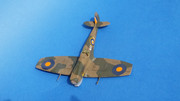
The Spitty depicted is a Tropical Mk.Vb (Vokes filter) with clipped wings and non-standard De Havilland metal prop and six stack exhausts as opposed to the normal Rotol, mainly wooden, prop and 3 stack exhausts for the Spitfire Mk.V series.
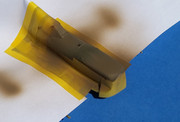
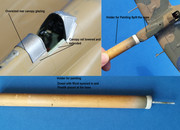
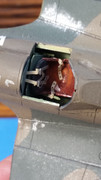
I started the project in 2014 then shelved (almost binned it) as I wasn’t happy with the far too matt finish, the oversized rear canopy glazing and that I split the nose open with the rivited dowel used to hold the model for painting.
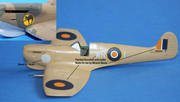
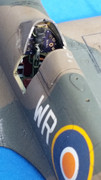
This build is a practice run as I made my own decals for the Squadron emblem and the codes, roundels and blank for the cat were masks made for me by Miracle Masks. The emblem was printed on a laser printer using clear decal film then coated with Humbrol clear gloss coat. The decal was then placed over the white blank as the dark colours would otherwise bleed through.
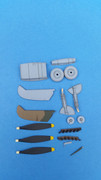
The Kit is the Basic Tamiya kit with Eduard Photoetch, Quickboost 6 stack exhaust for the Mk.IX, Ultracast Prop Blades and Master Gun Barrels
The photos here are fairly random as they are partly from 2014 and today.
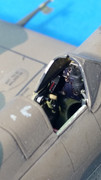
The Kit is the Basic Tamiya kit with Eduard Photoetch, Quickboost 6 stack exhaust for the Mk.IX, Ultracast Prop Blades and Master Gun Barrels. Did some scratch building in the cockpit and lowered and extended the canopy rail using Plasticard.

I also cut the elevators off and am using the spares from an Eduard Mk.IX kit
The split nose has been re-glued, sanded down and is ready to be repainted. Most of the model has also been rubbed down with Micromesh to get rid of the Matt finish. Hopefully by posting this I am committing myself to finish the model!!