The SAAF Forum

Discussion on the SAAF and other southern African air forces.
It is currently 04 May 2024, 04:40

All times are UTC + 2 hours


Post new topic Reply to topic  [ 16 posts ]  Go to page 1, 2  Next
Author Message
PostPosted: 26 Nov 2018, 20:01 
Offline
User avatar

Joined: 01 Feb 2010, 18:06
Posts: 1033
Hi guys,

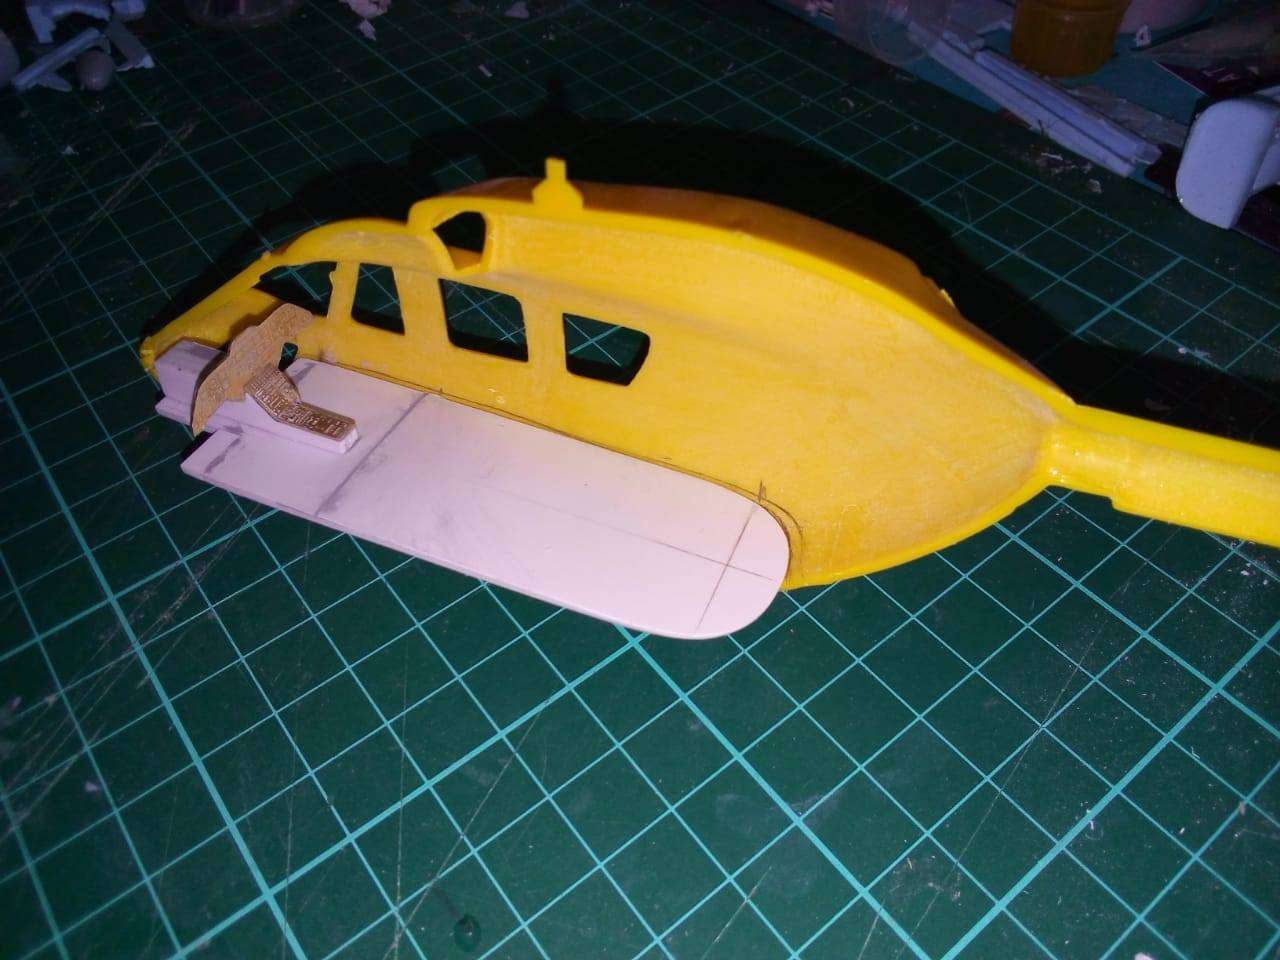
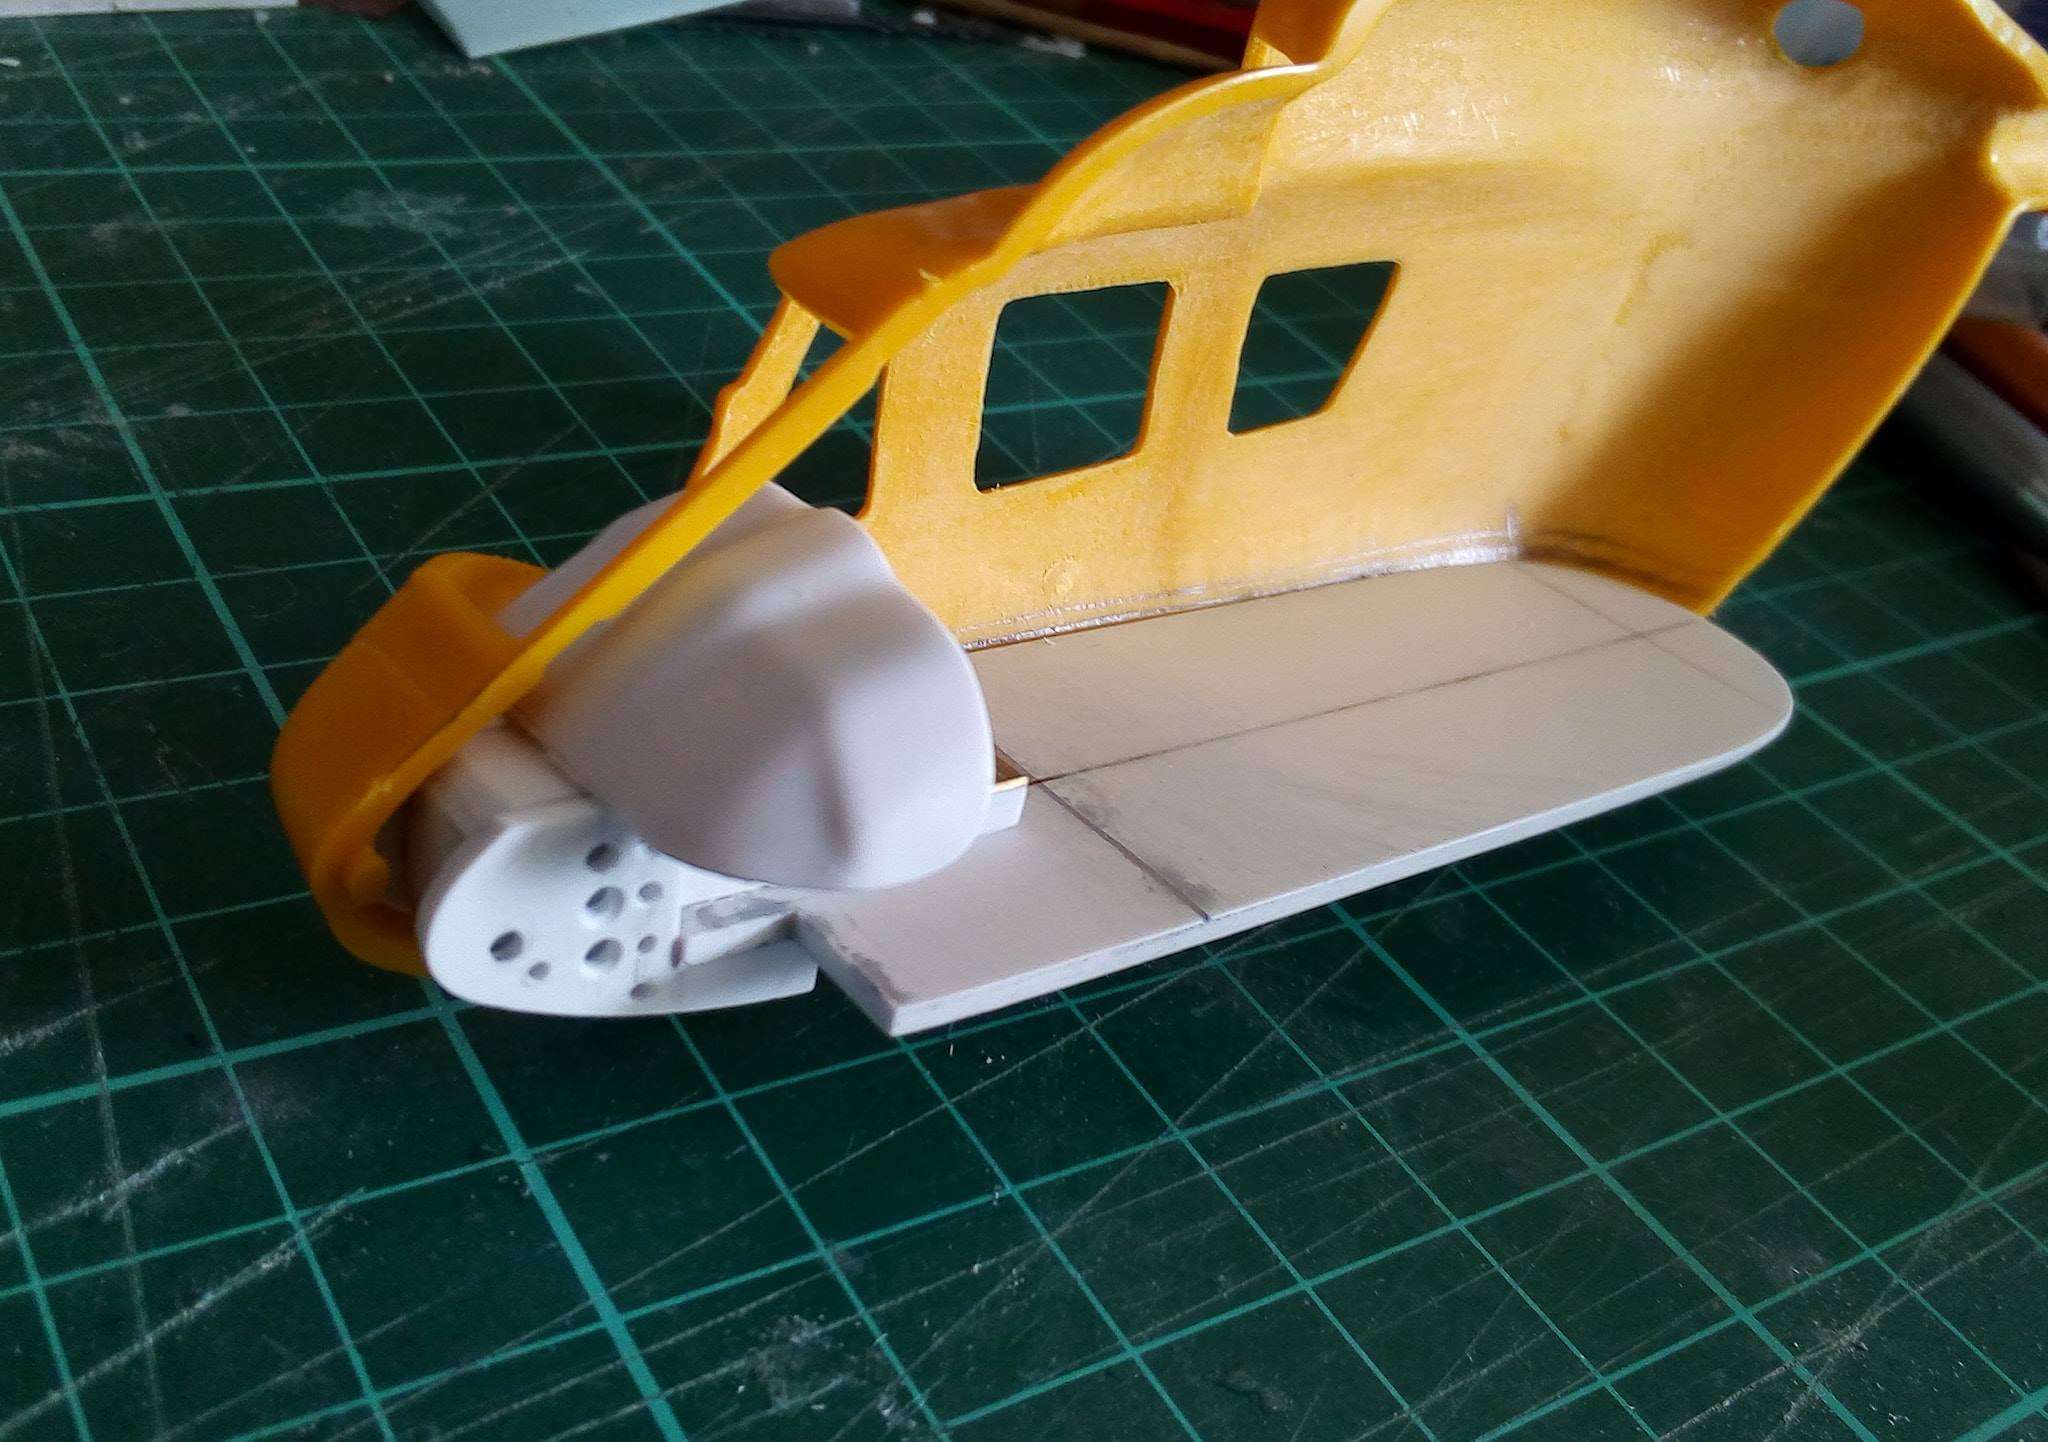
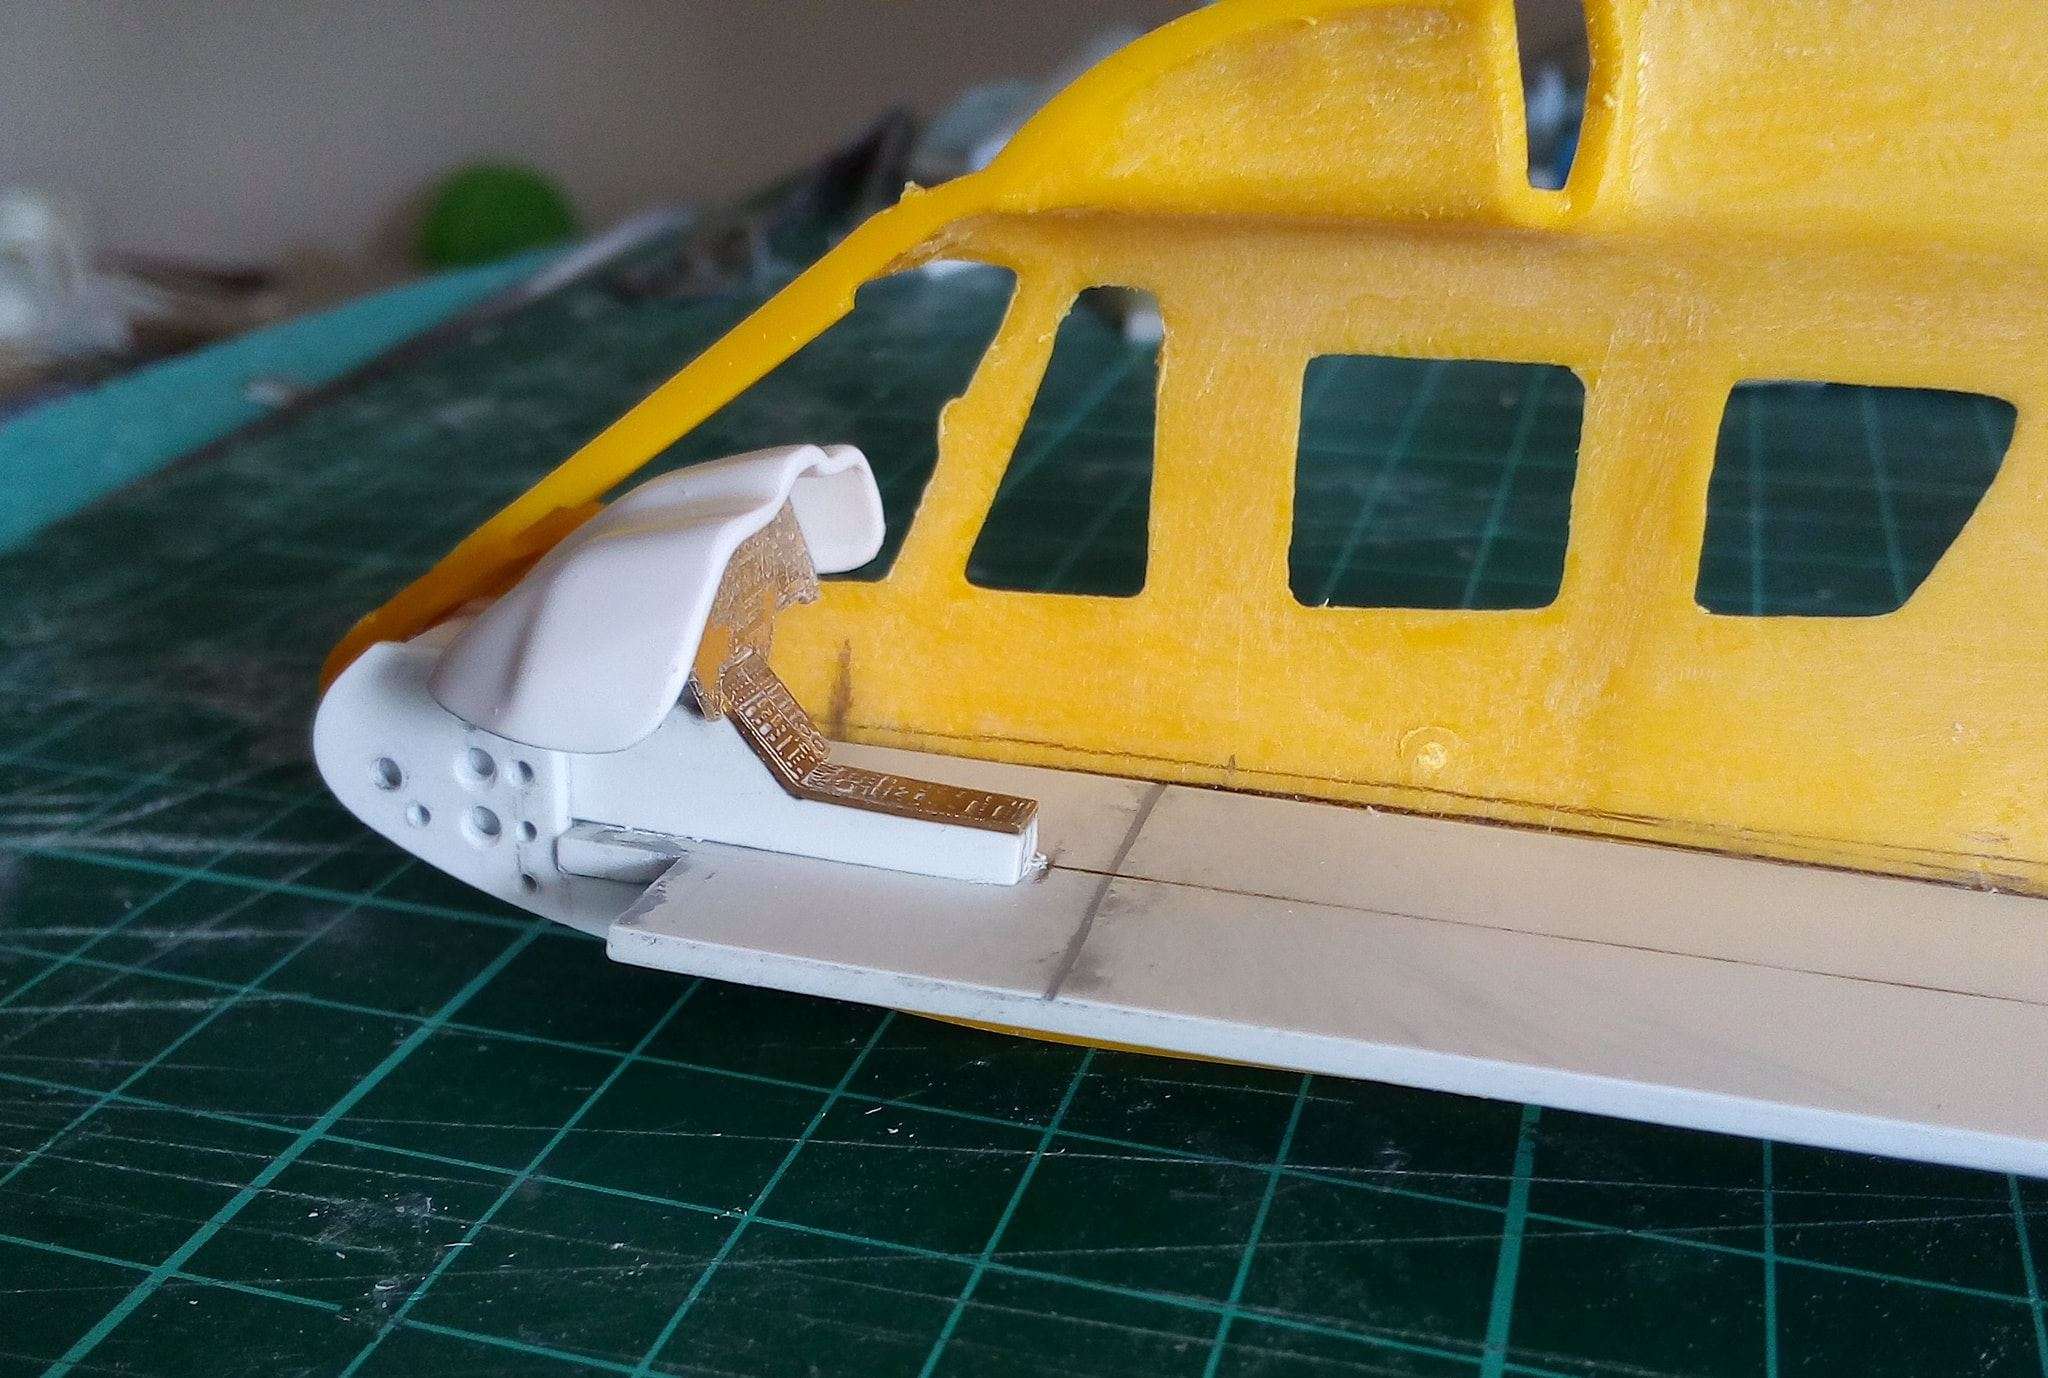
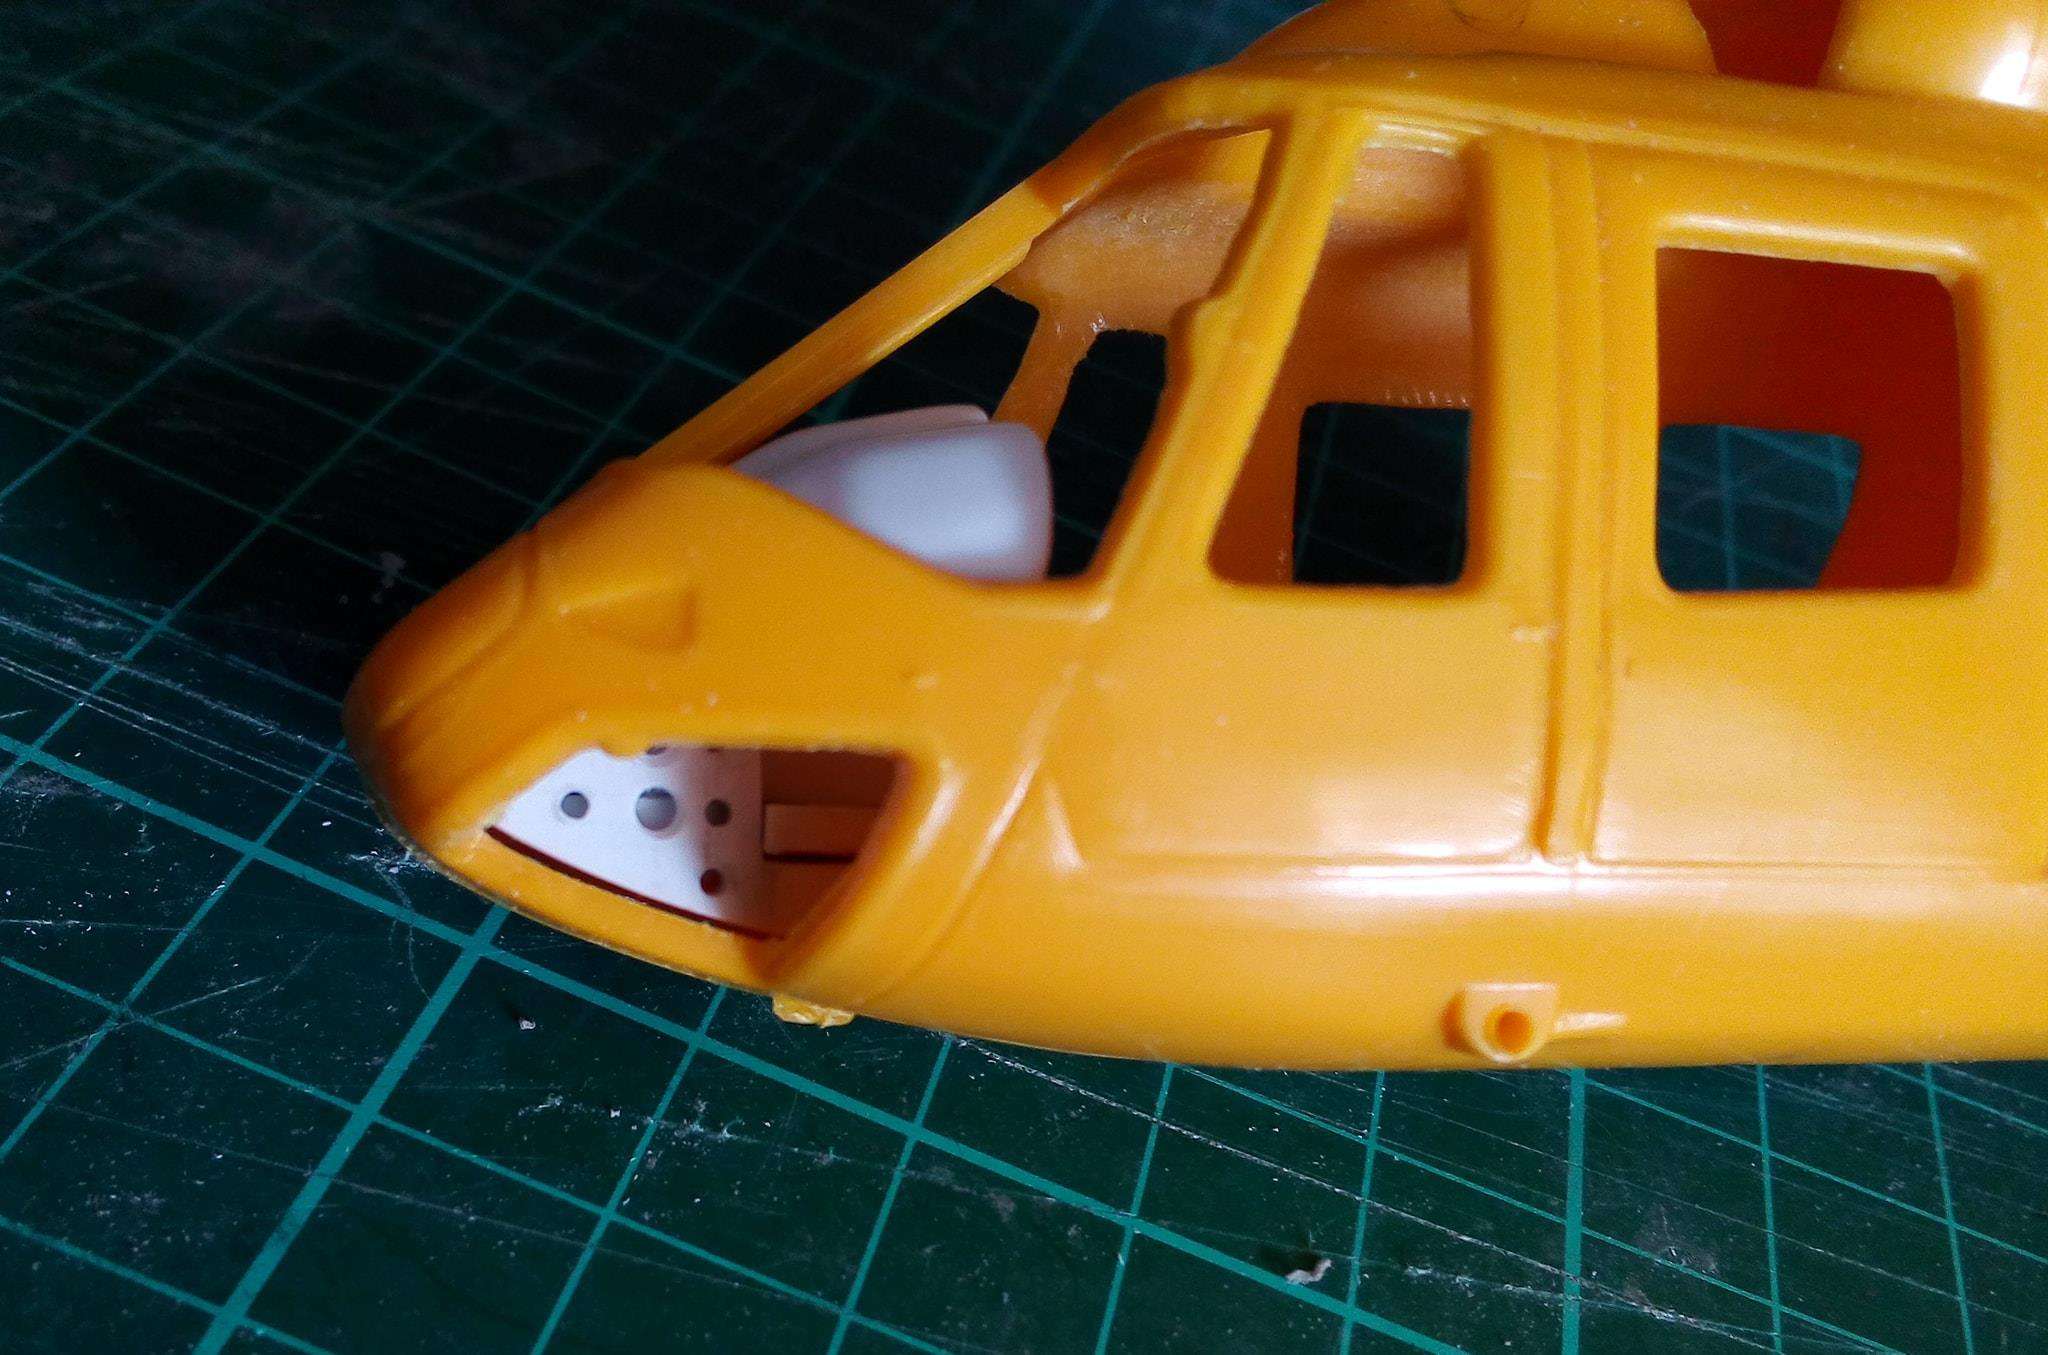
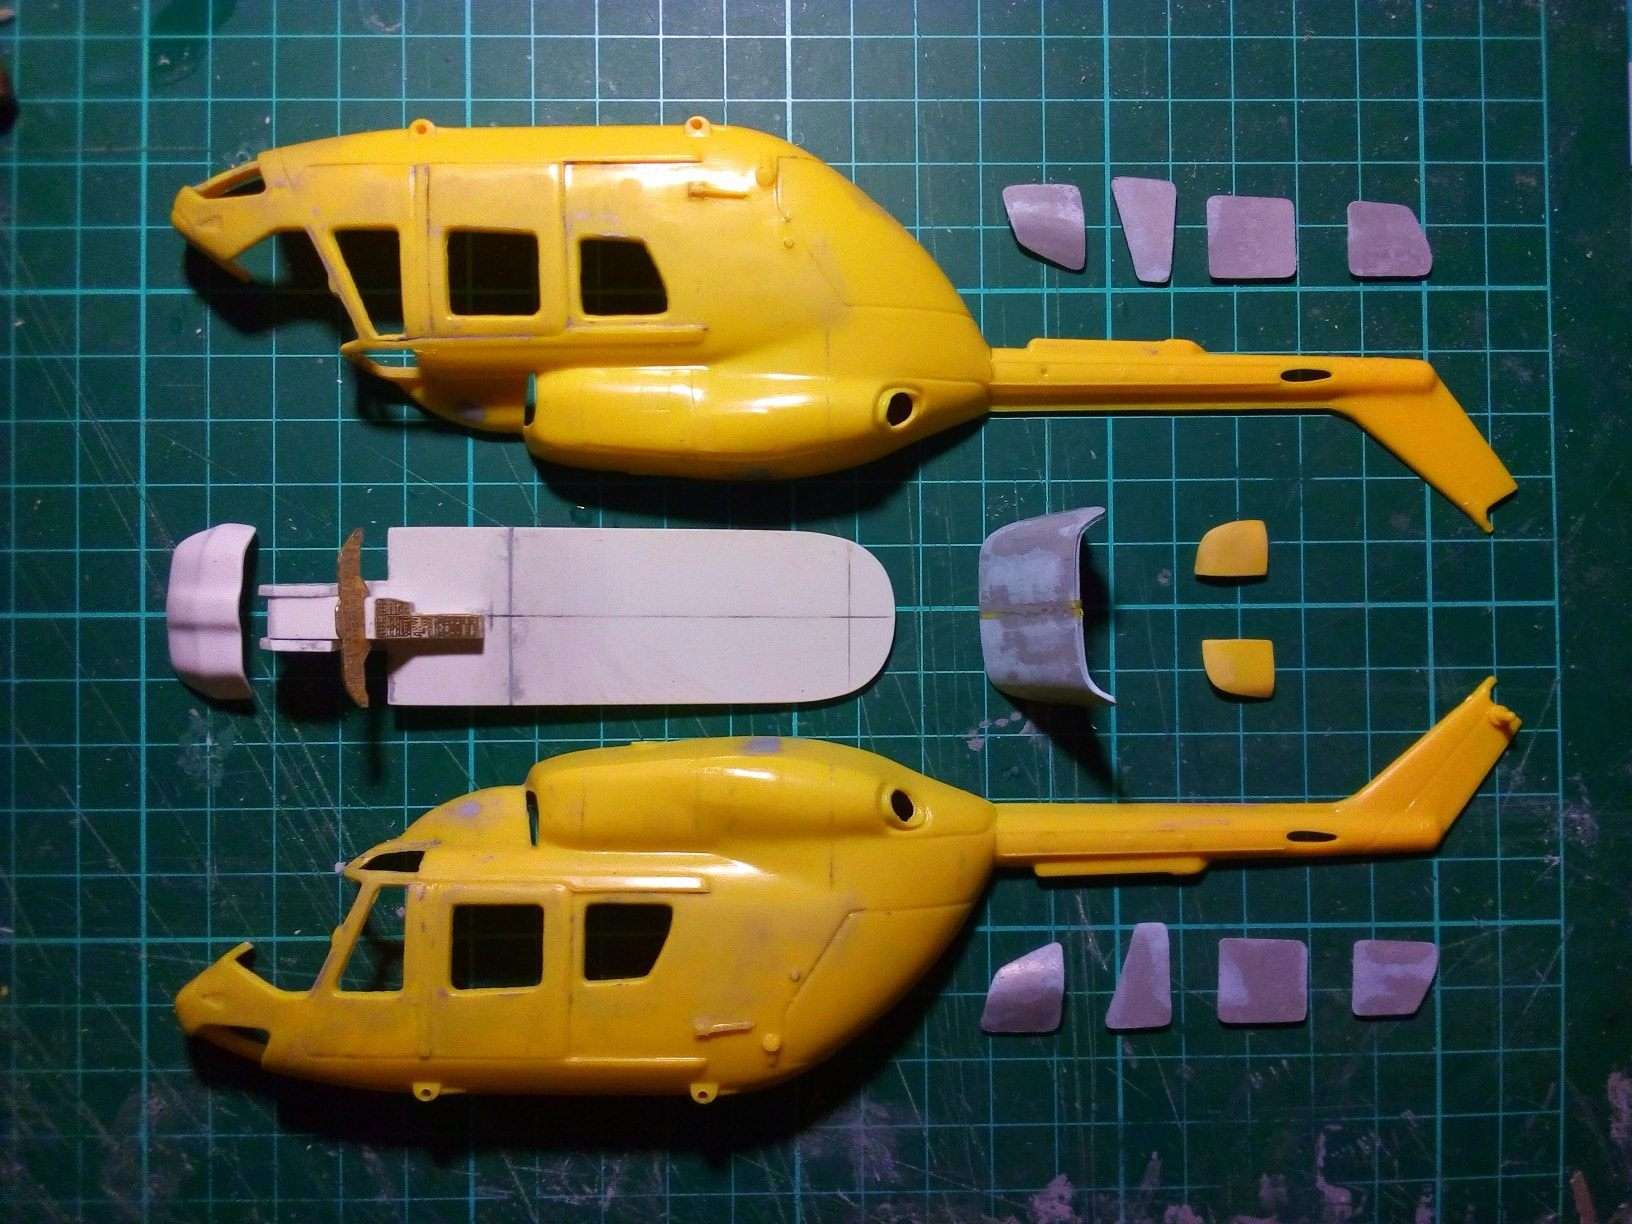
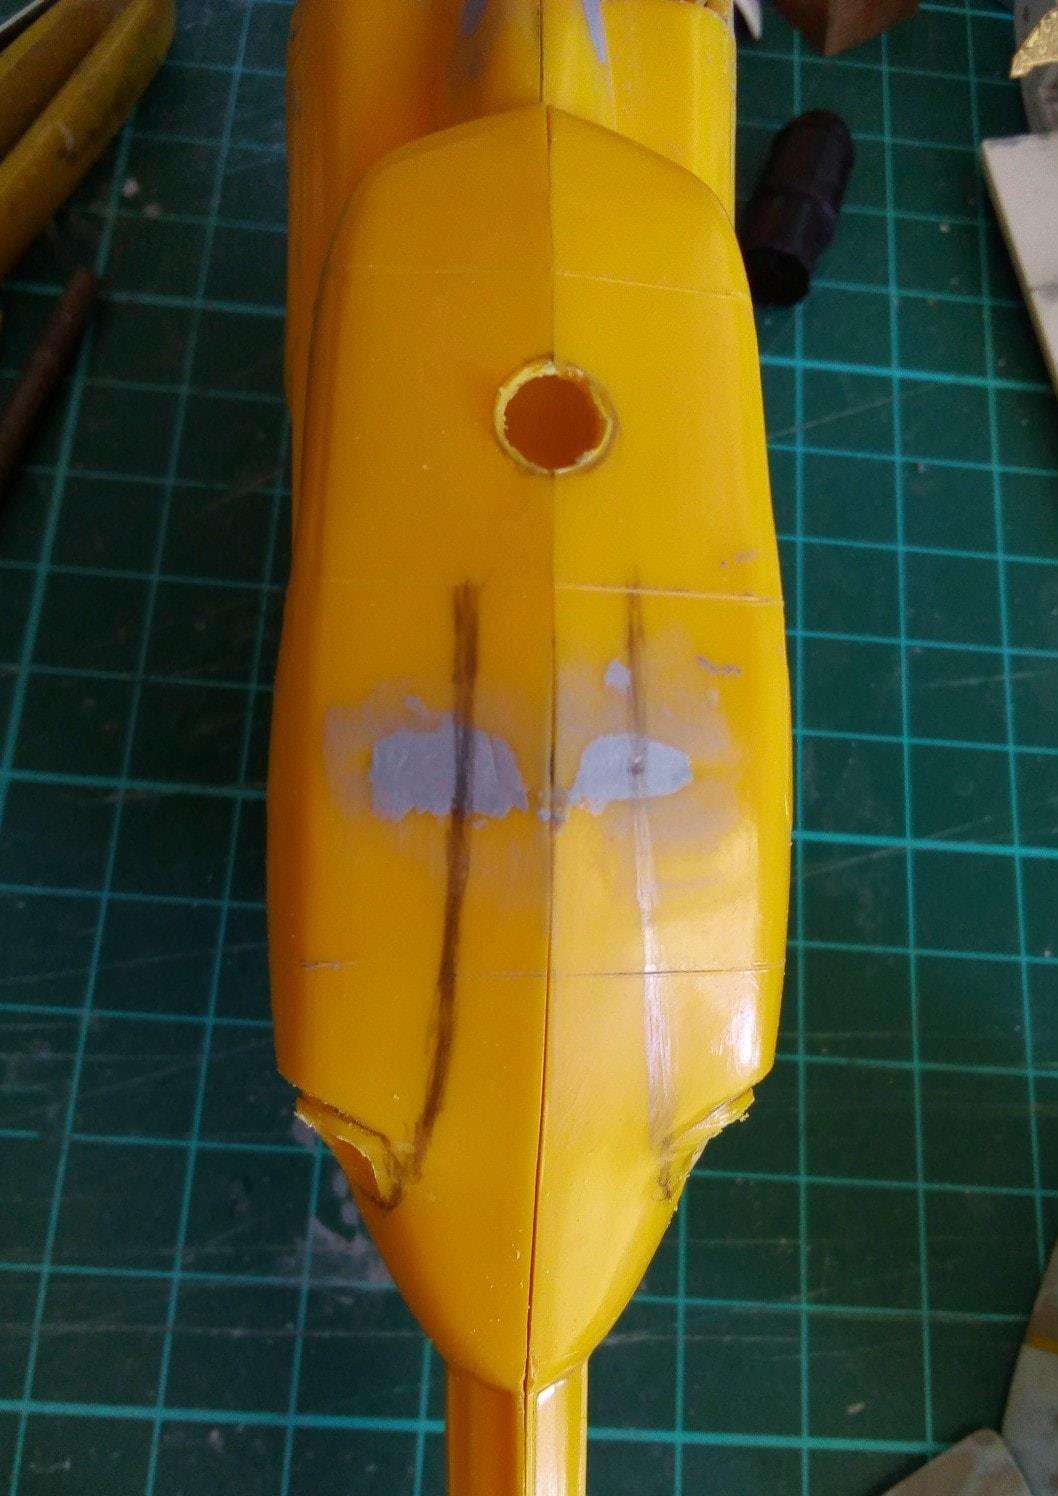
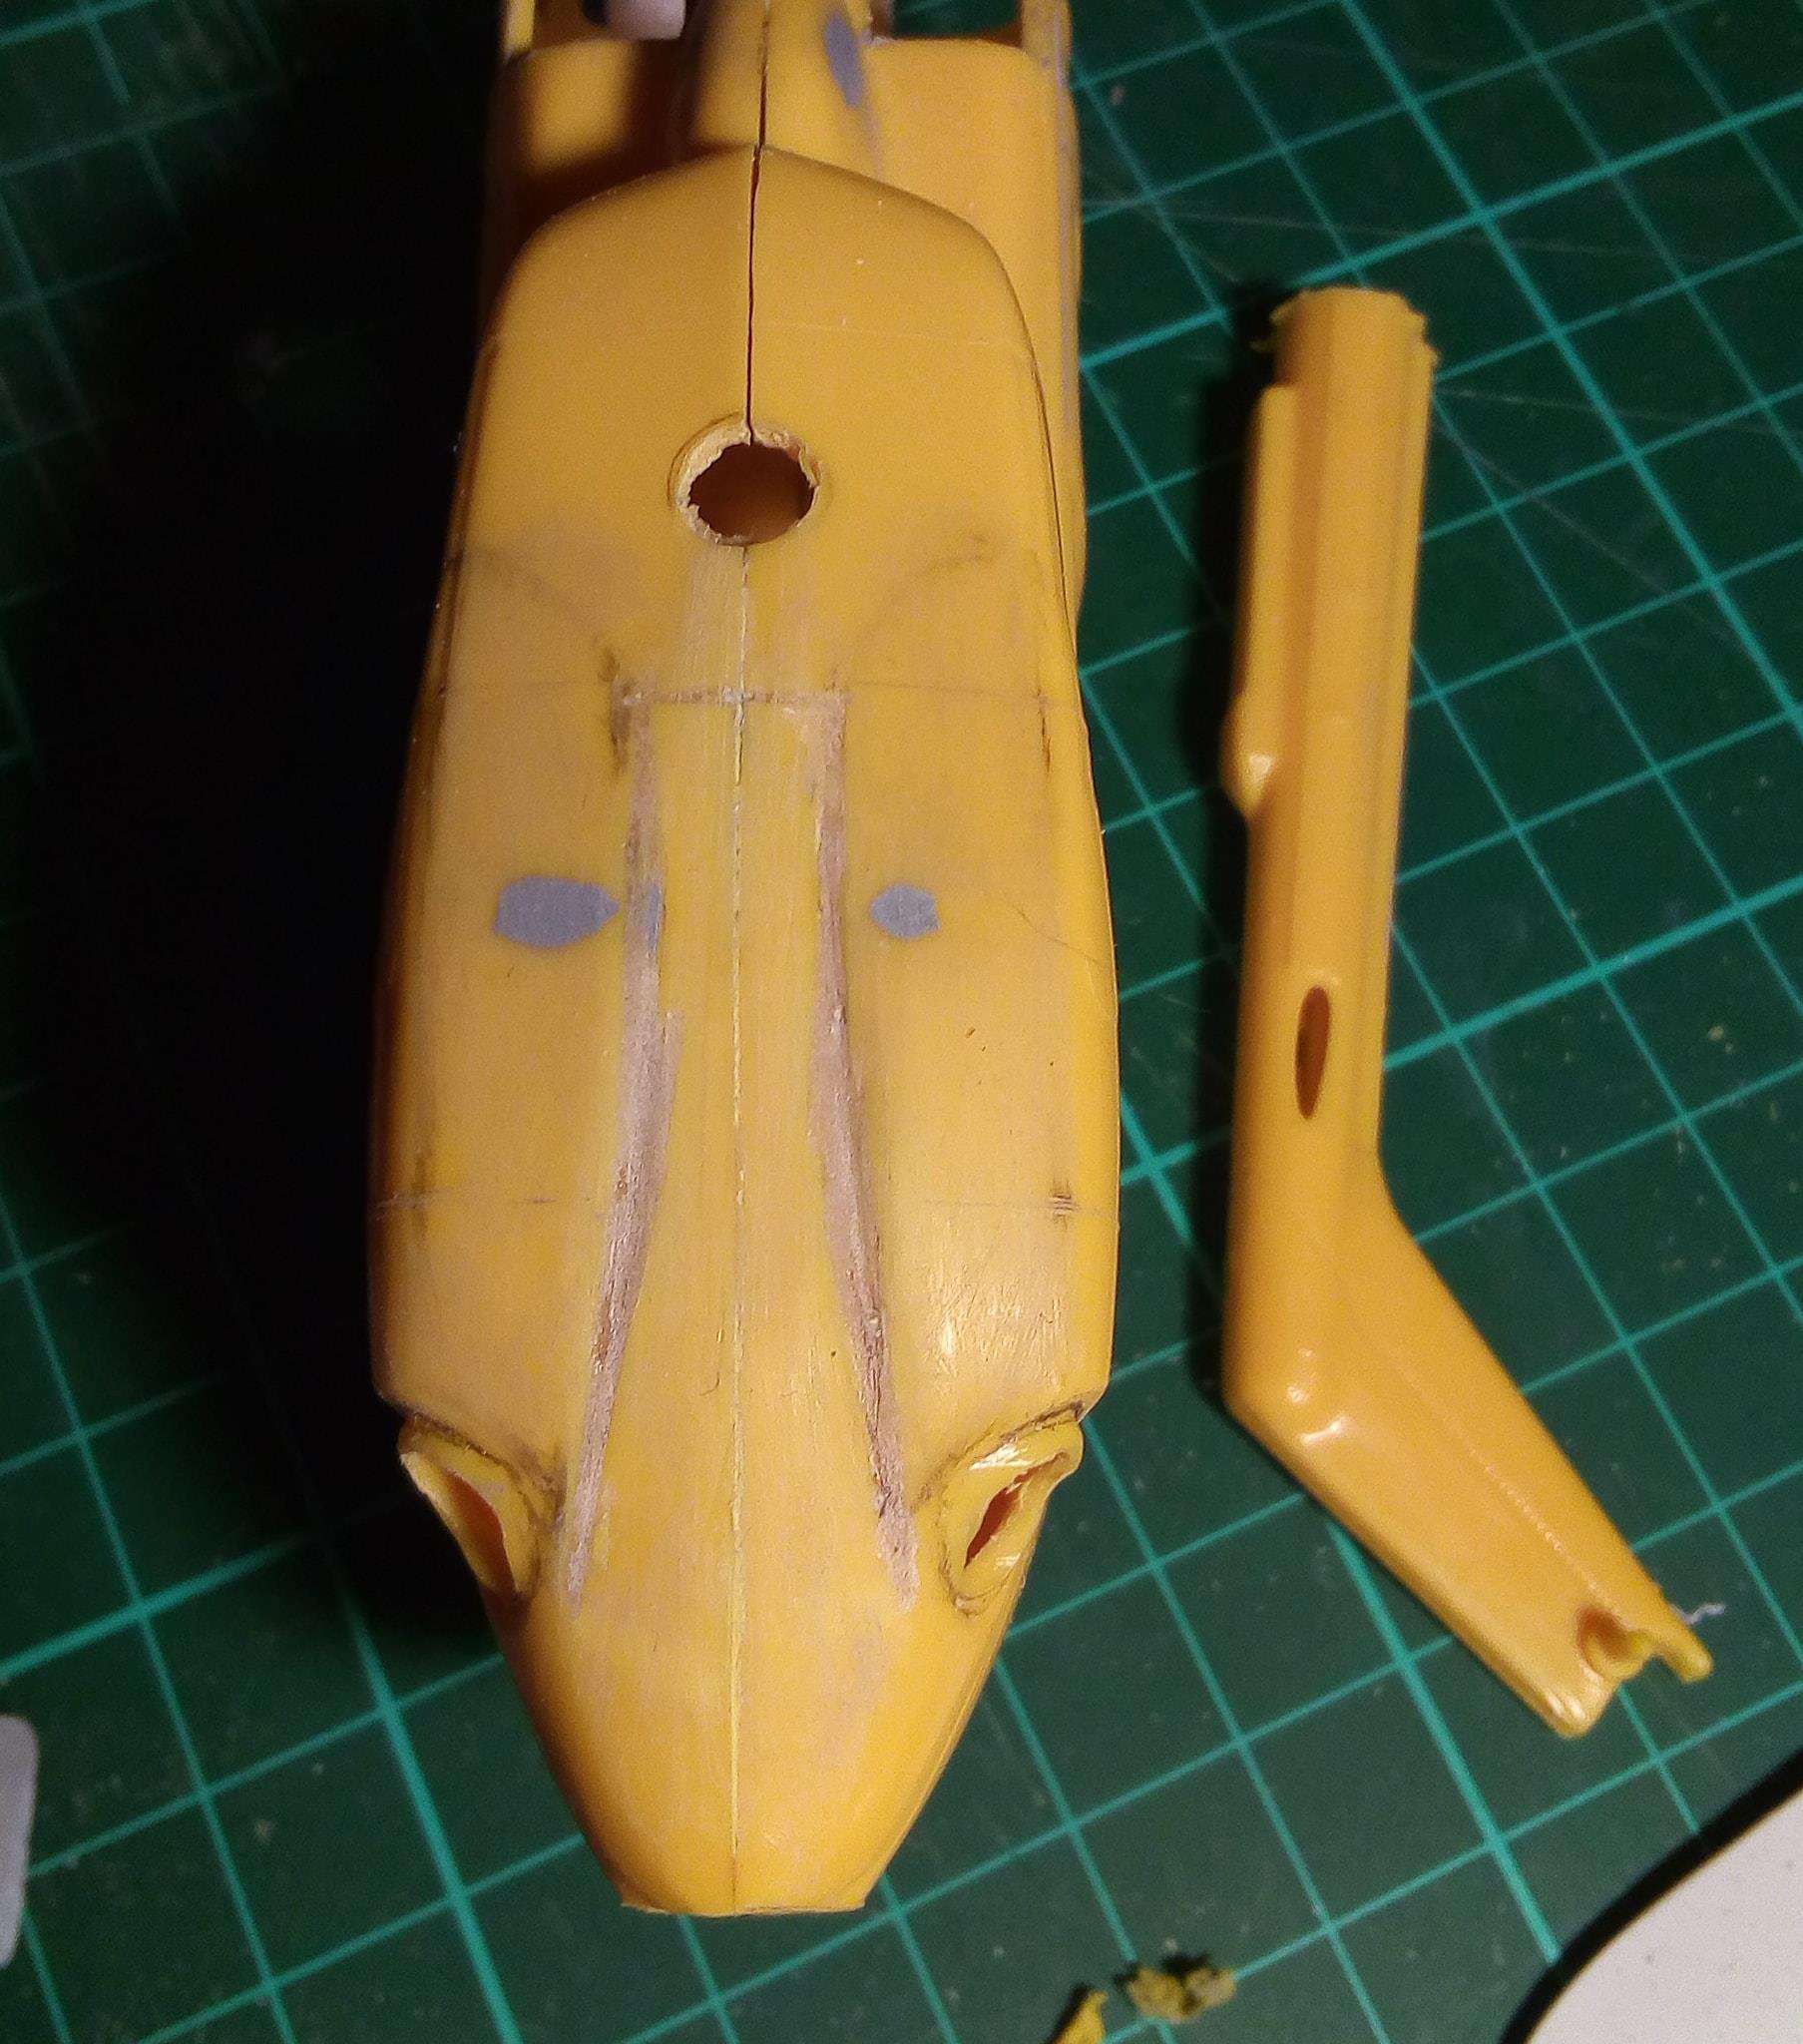
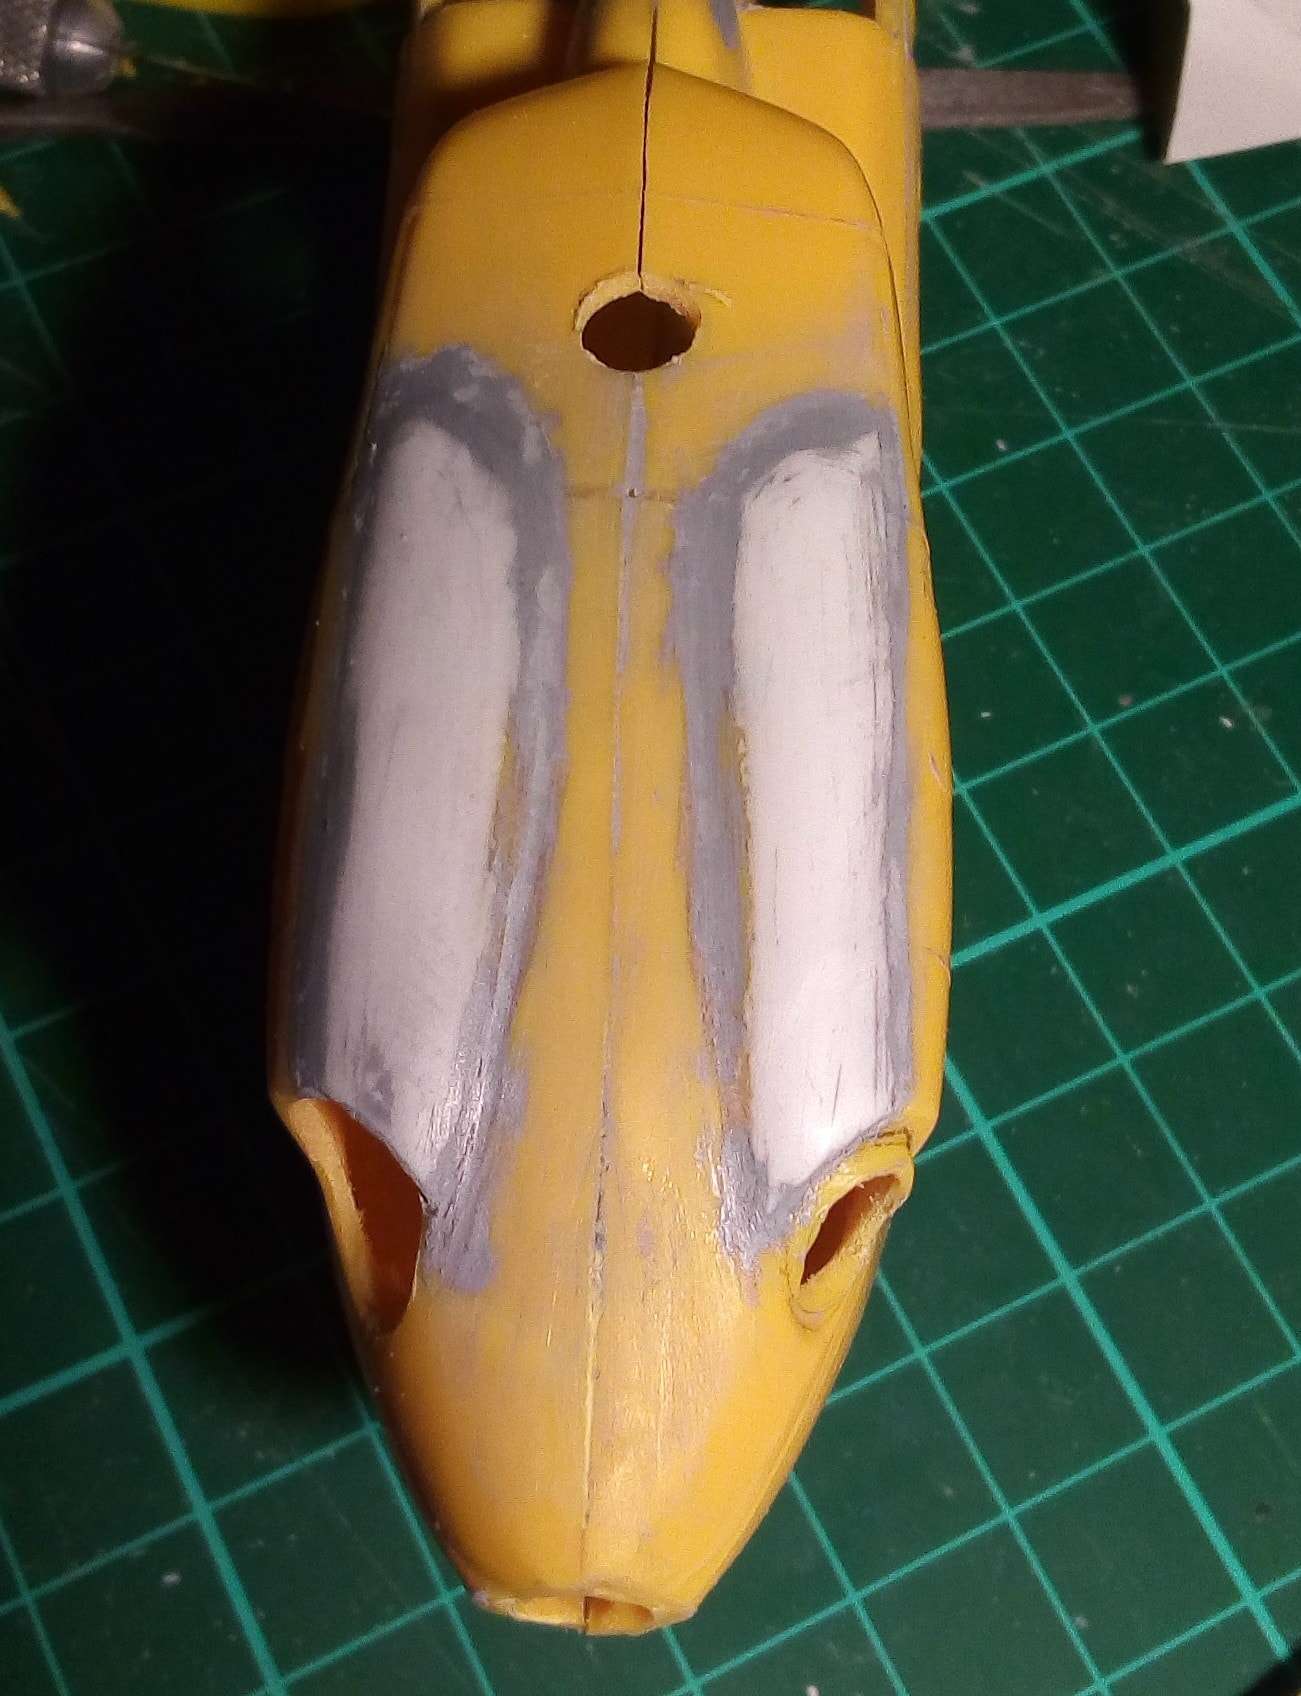
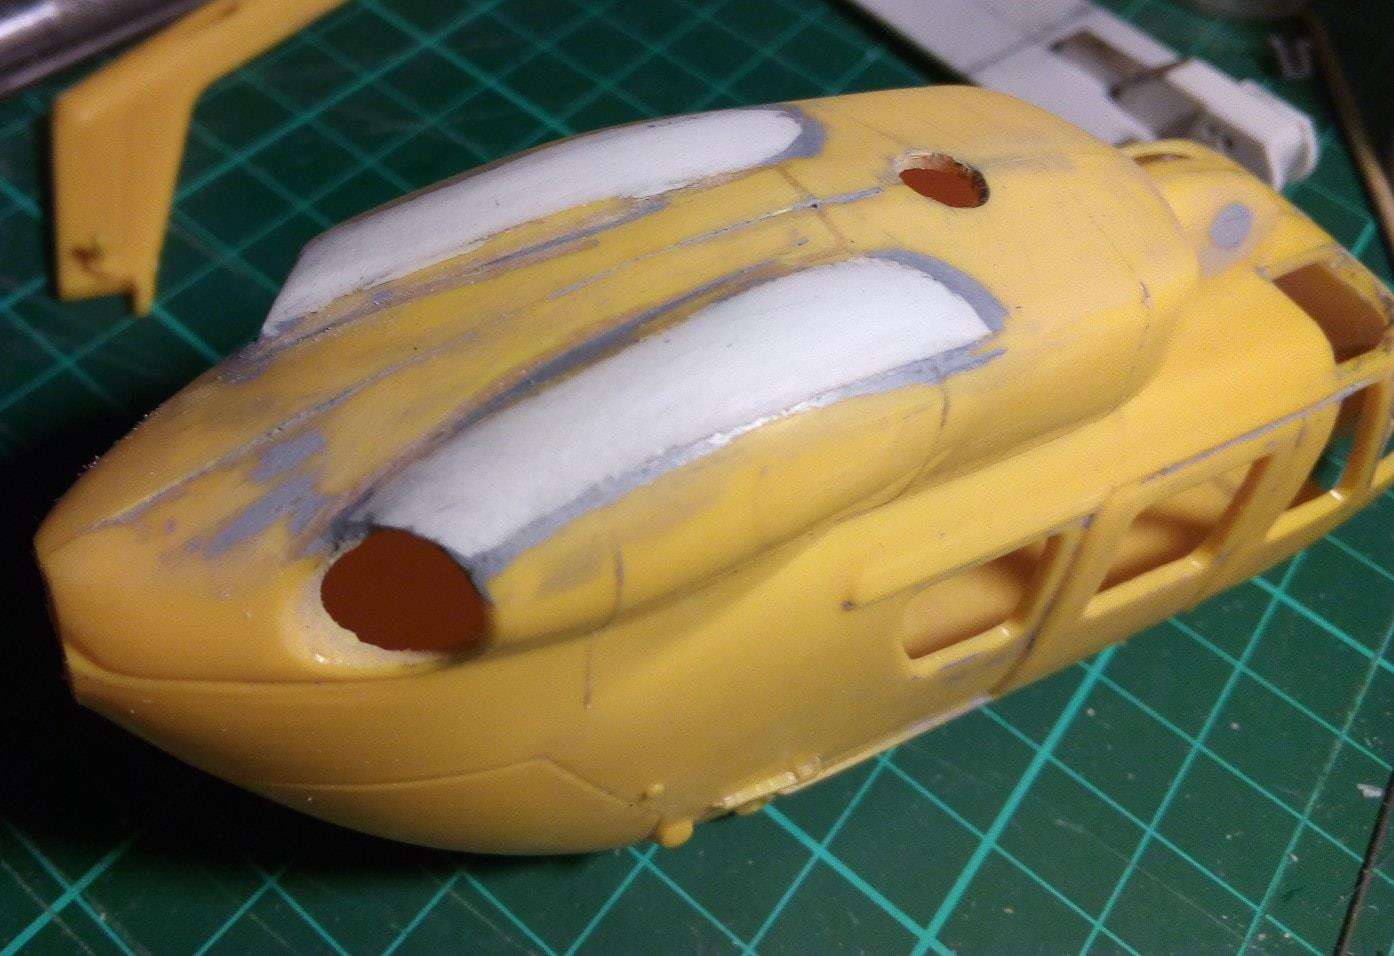
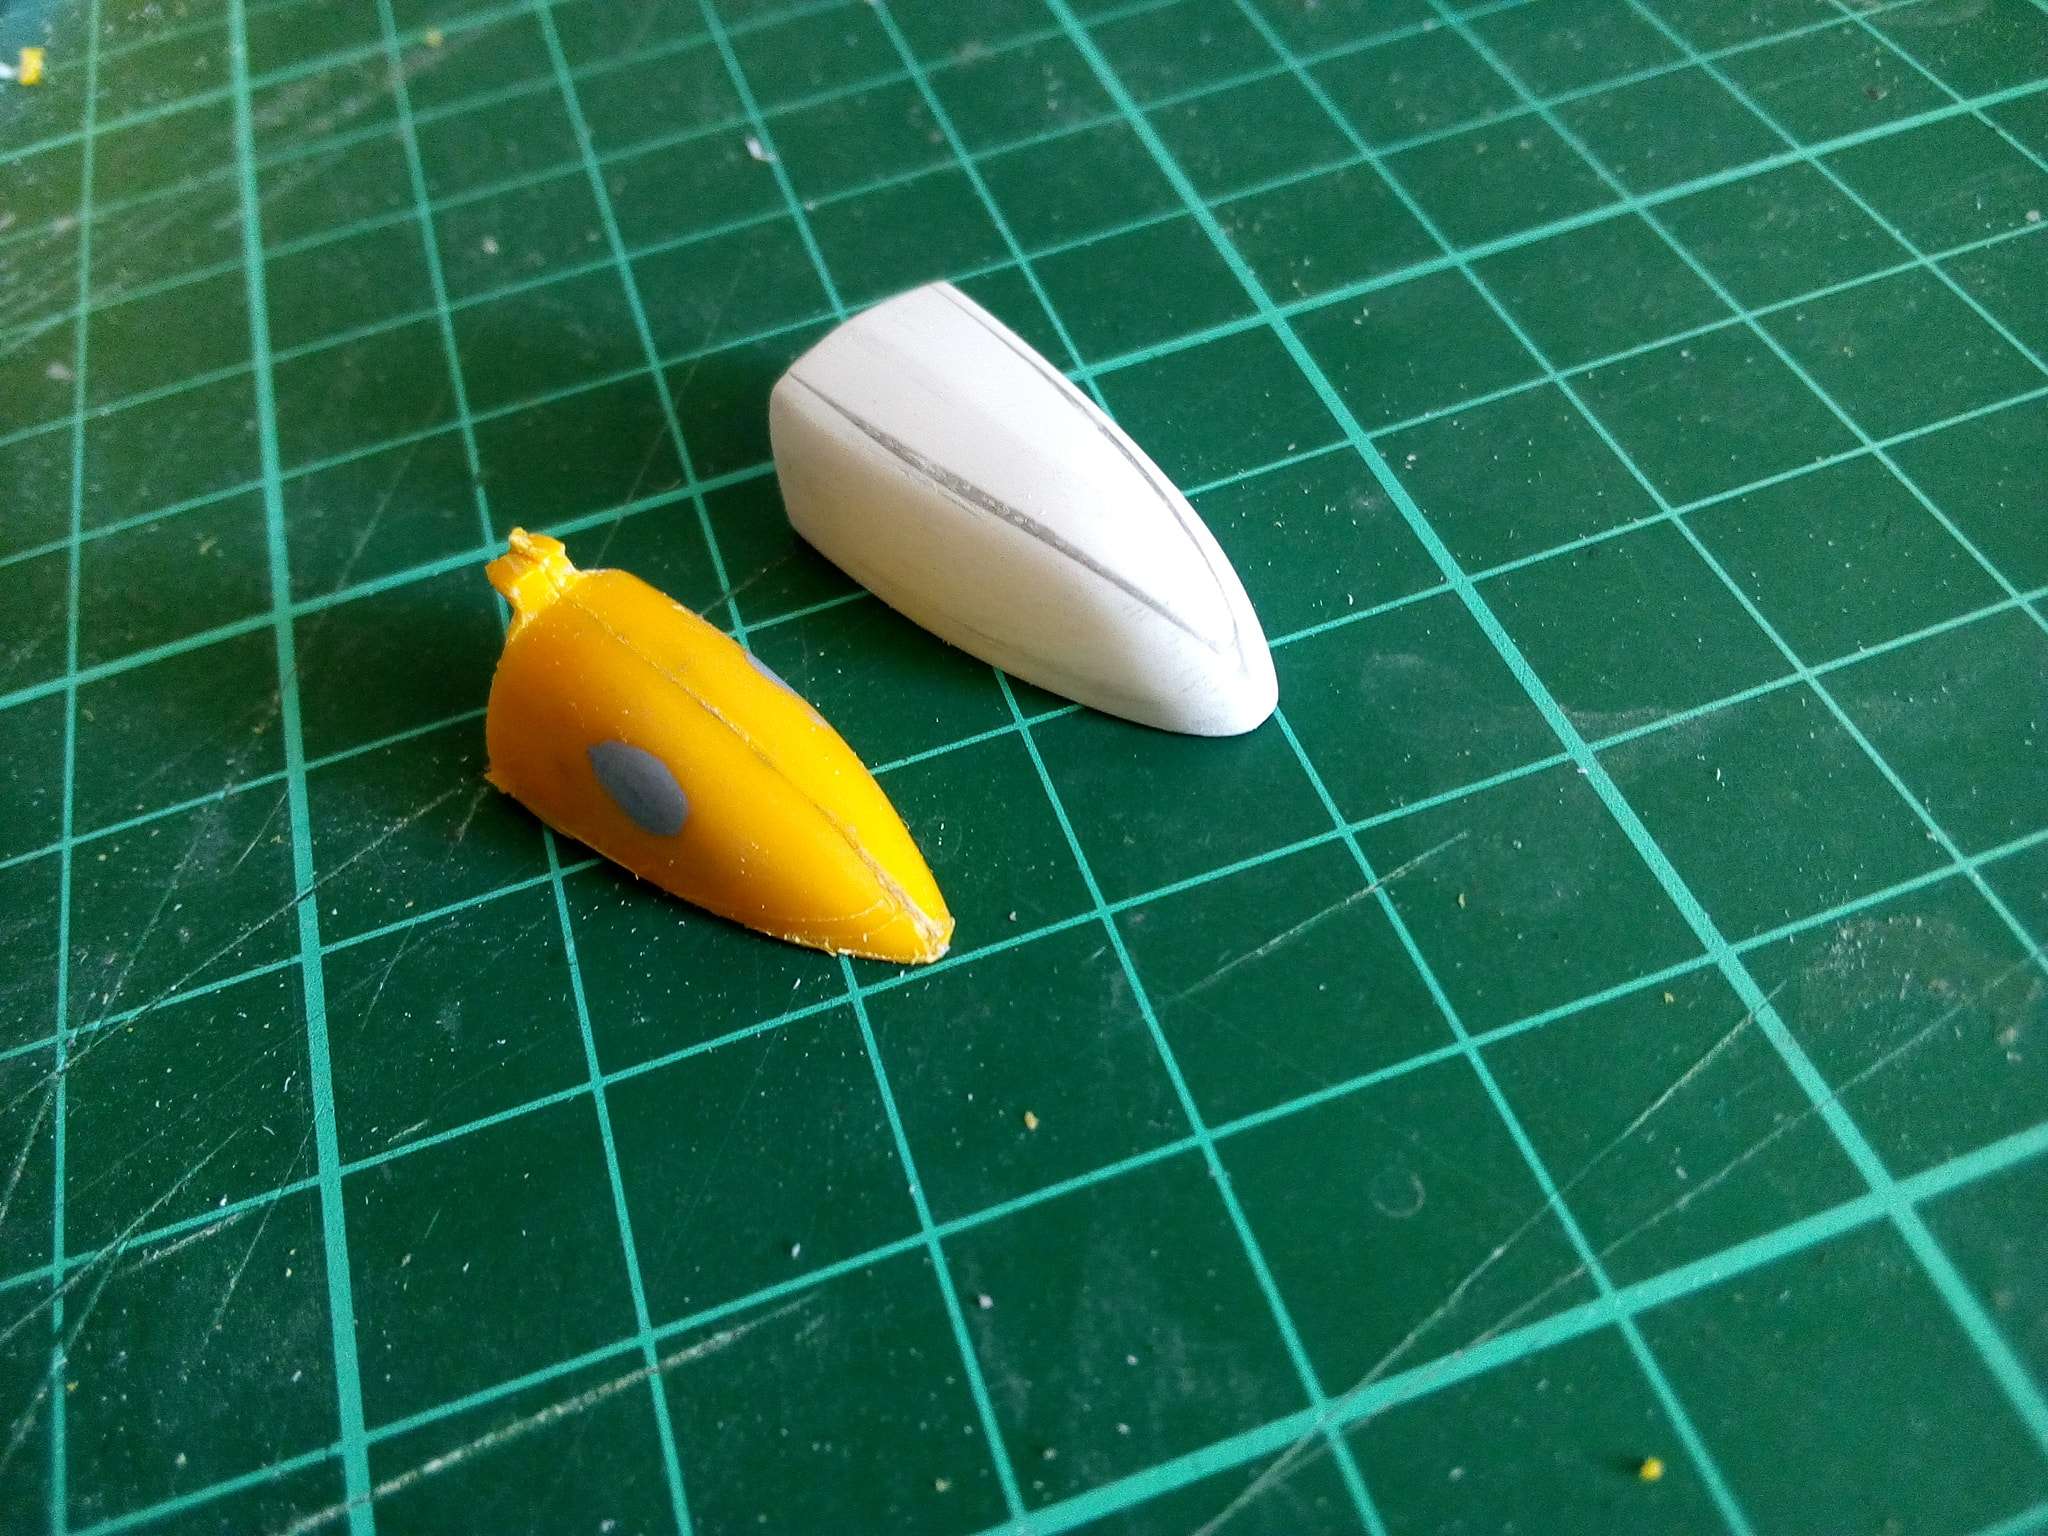
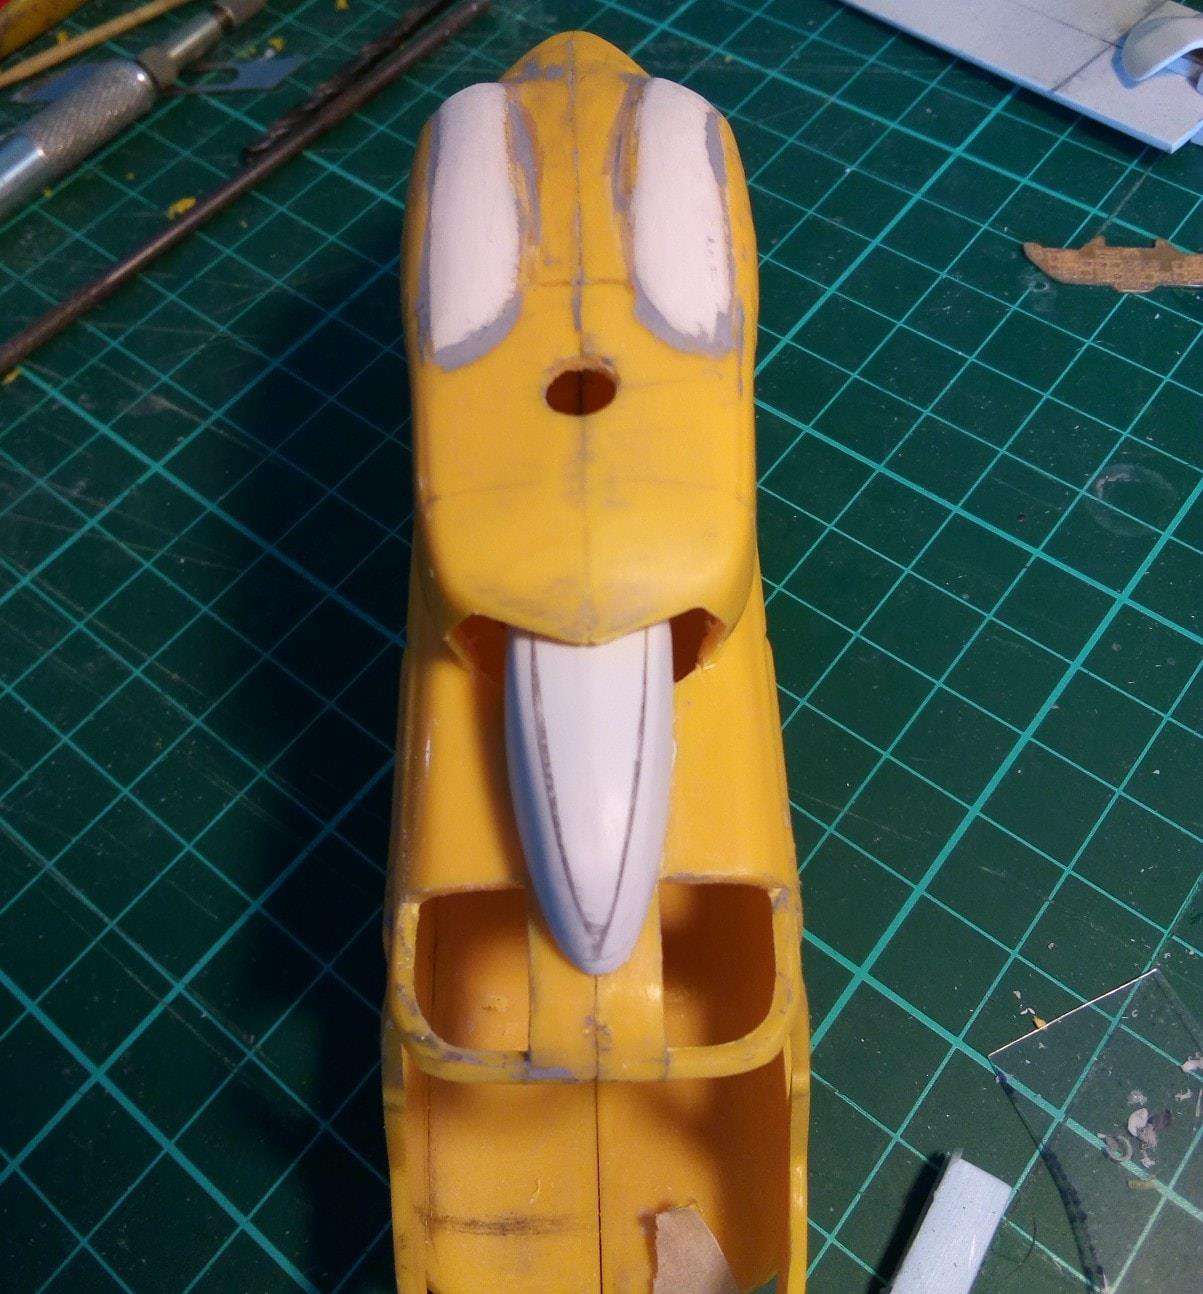
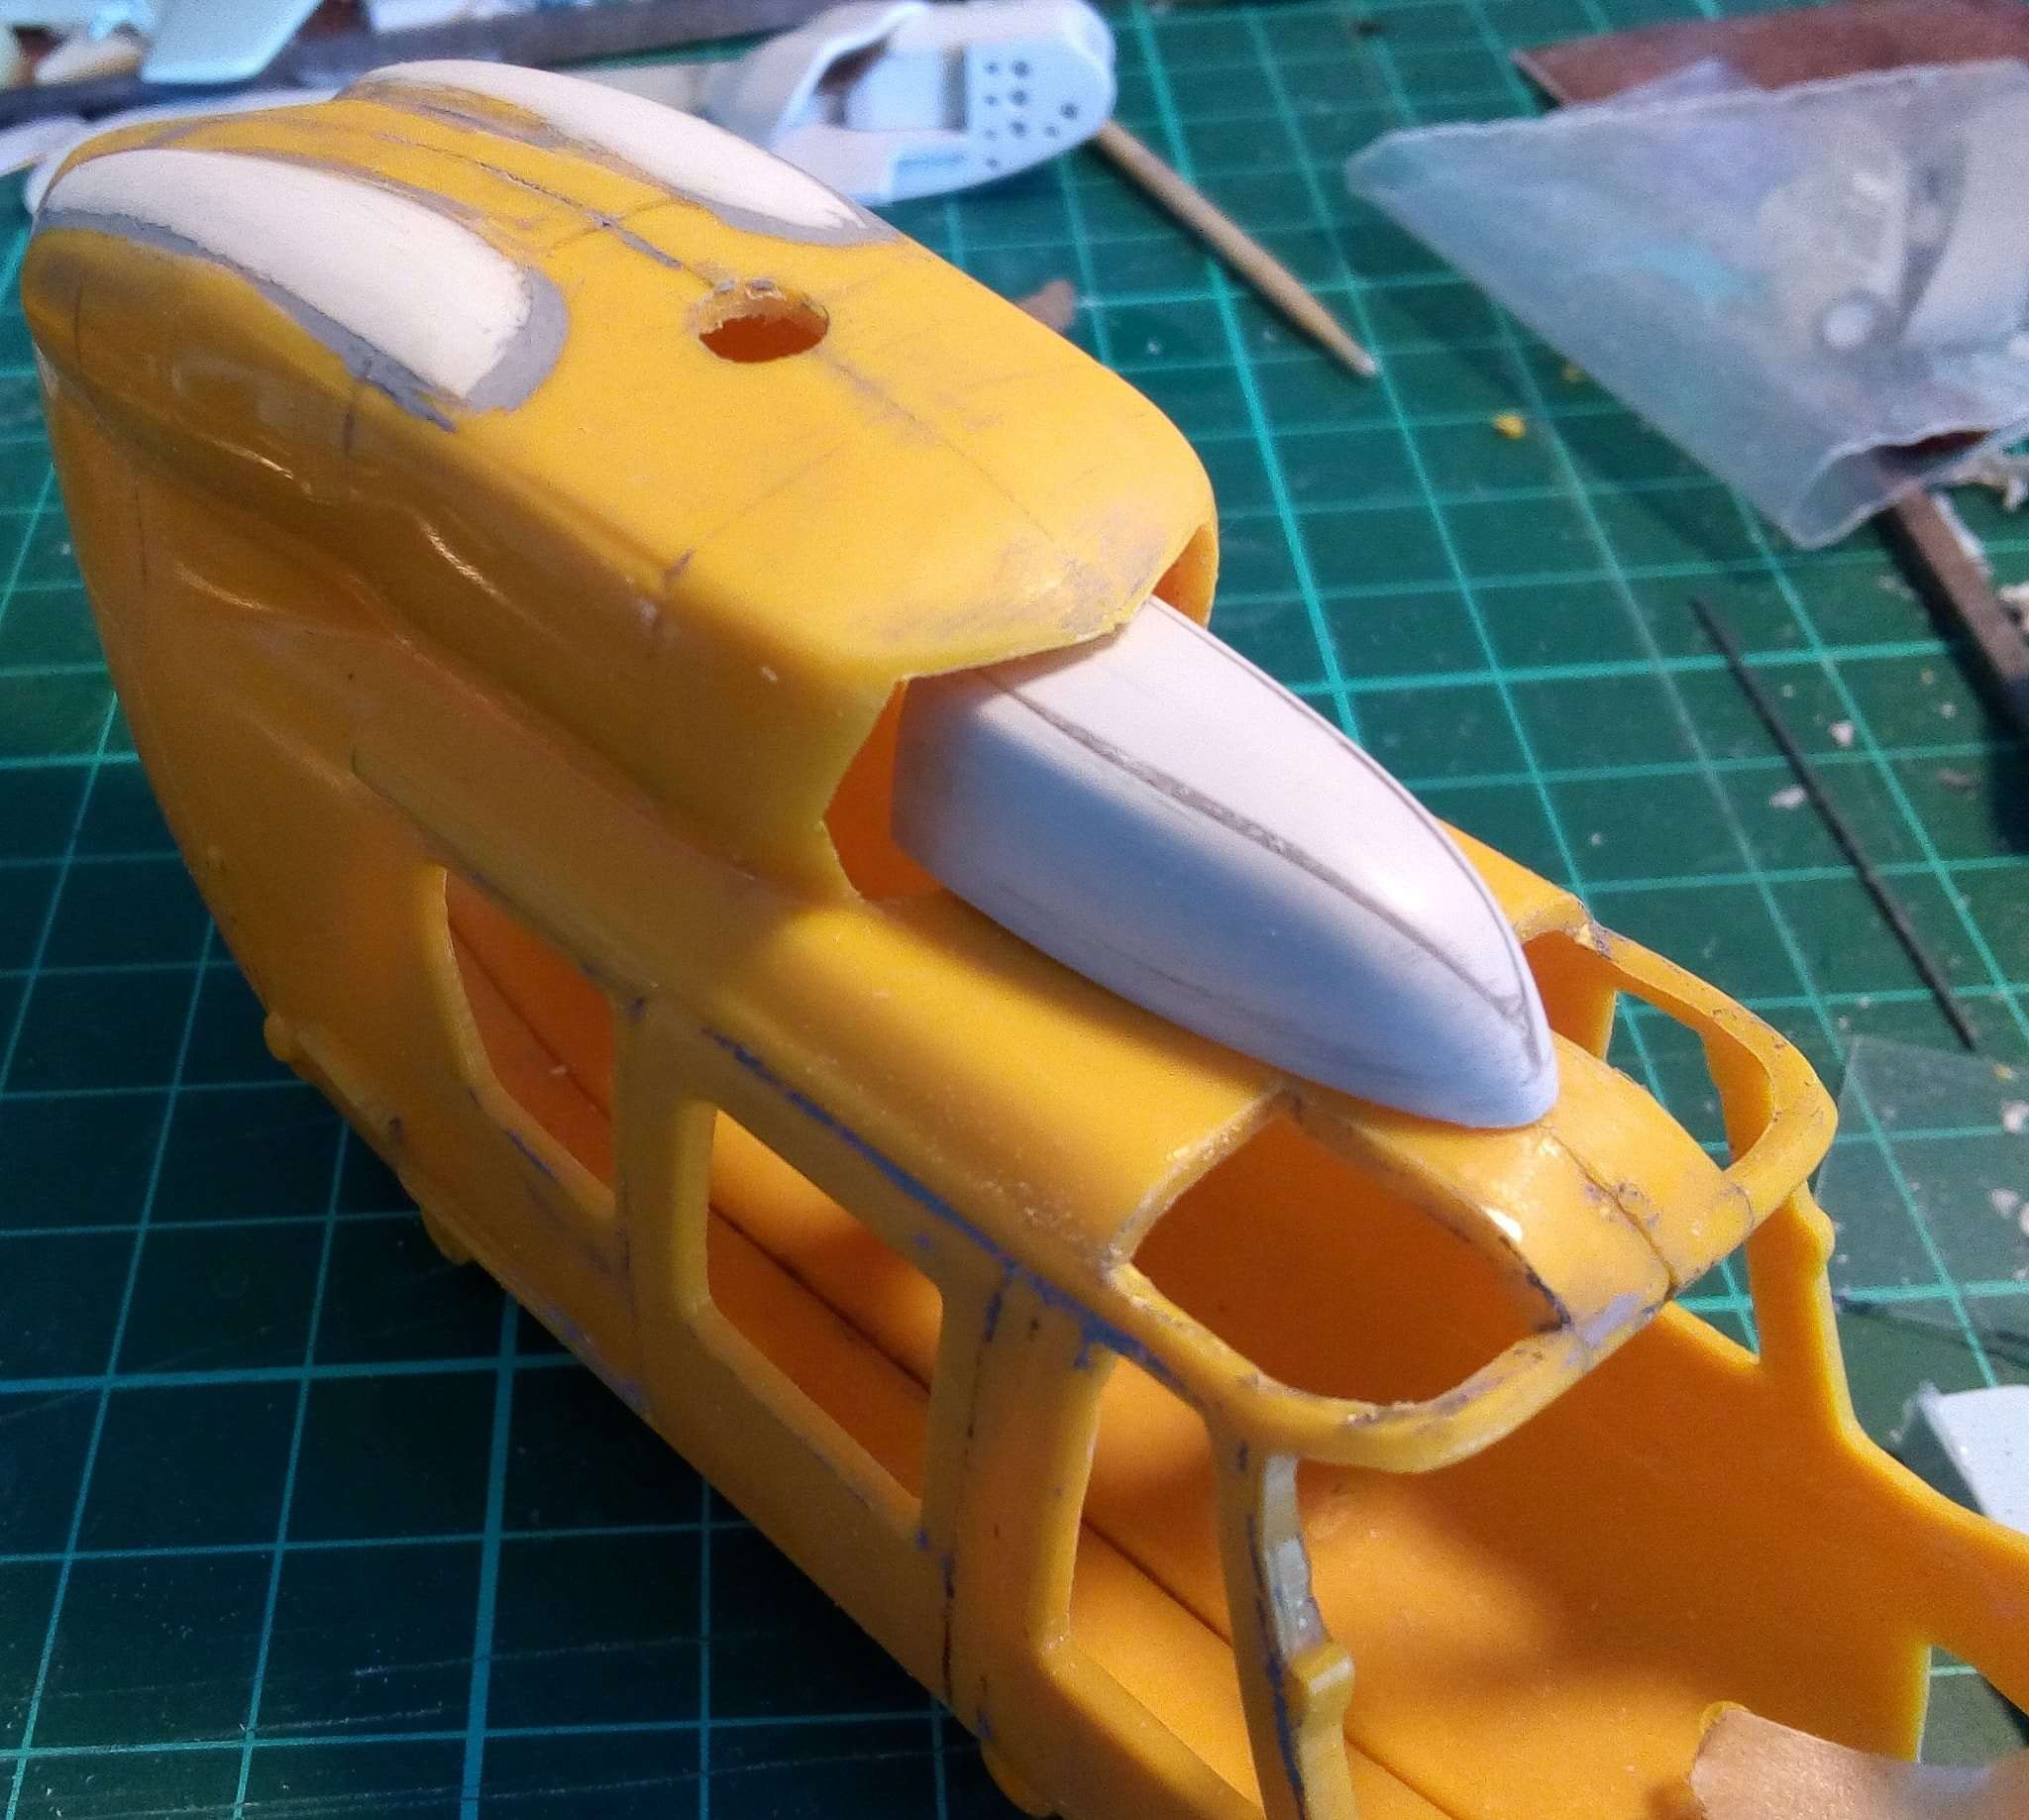
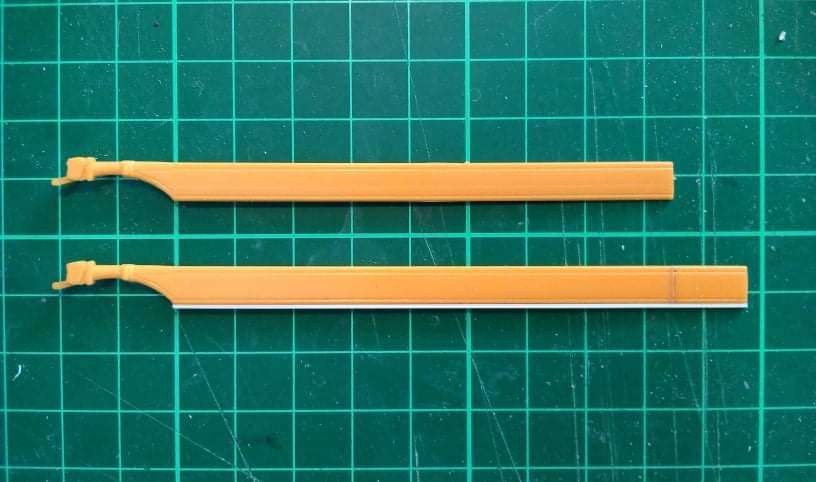
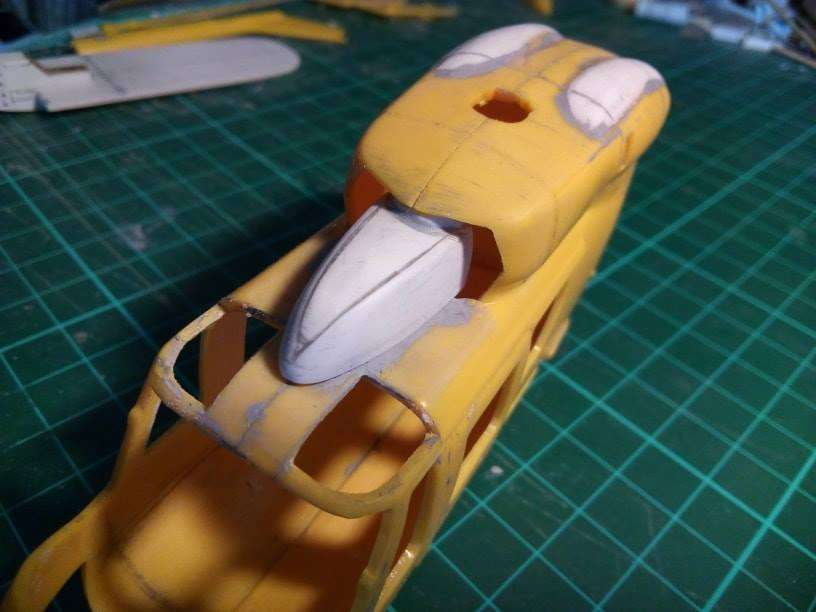
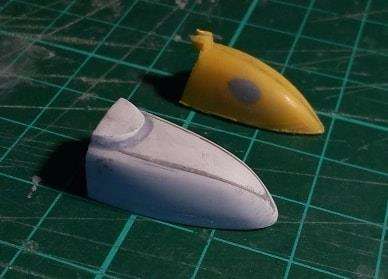
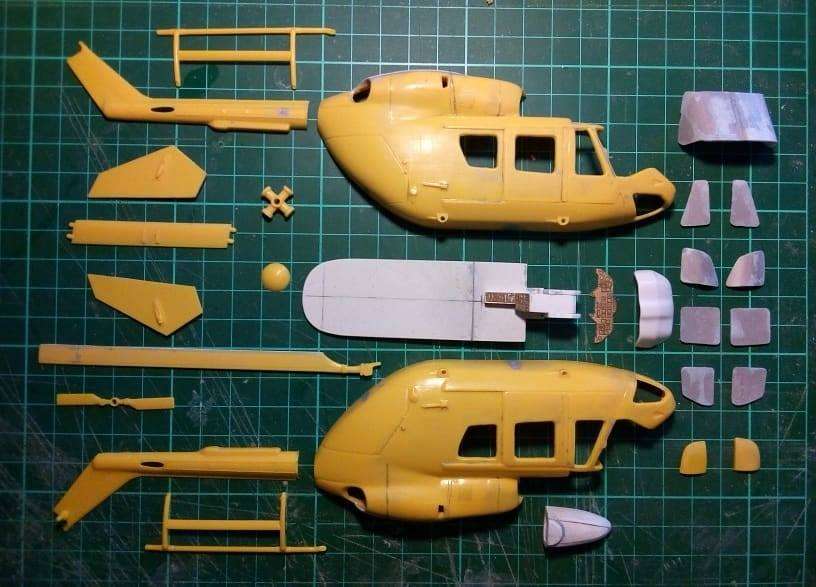
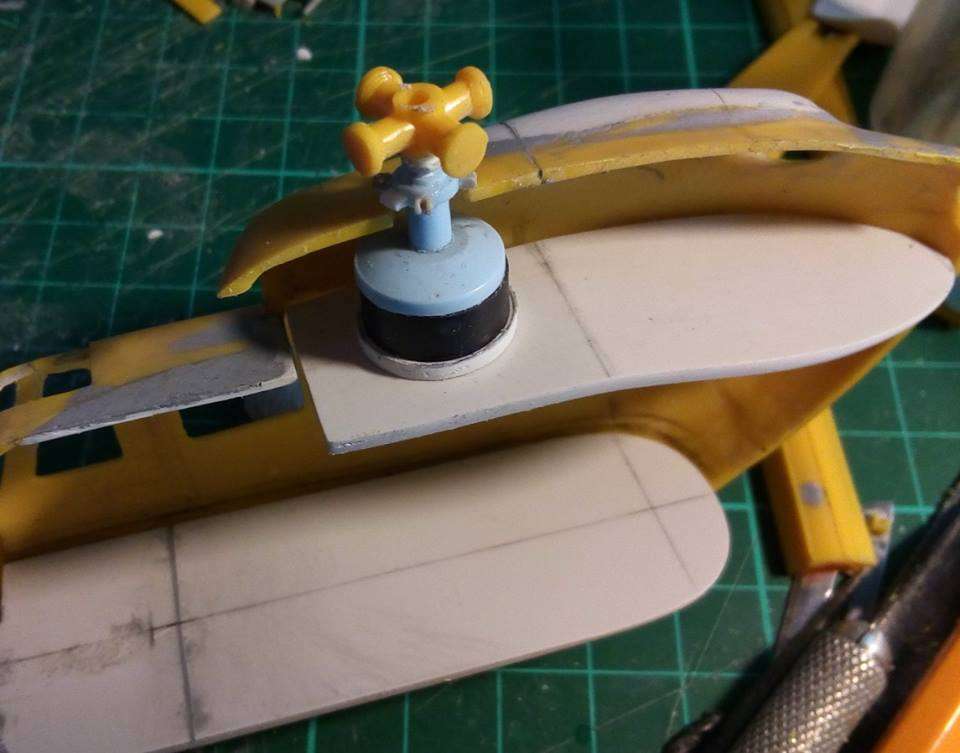
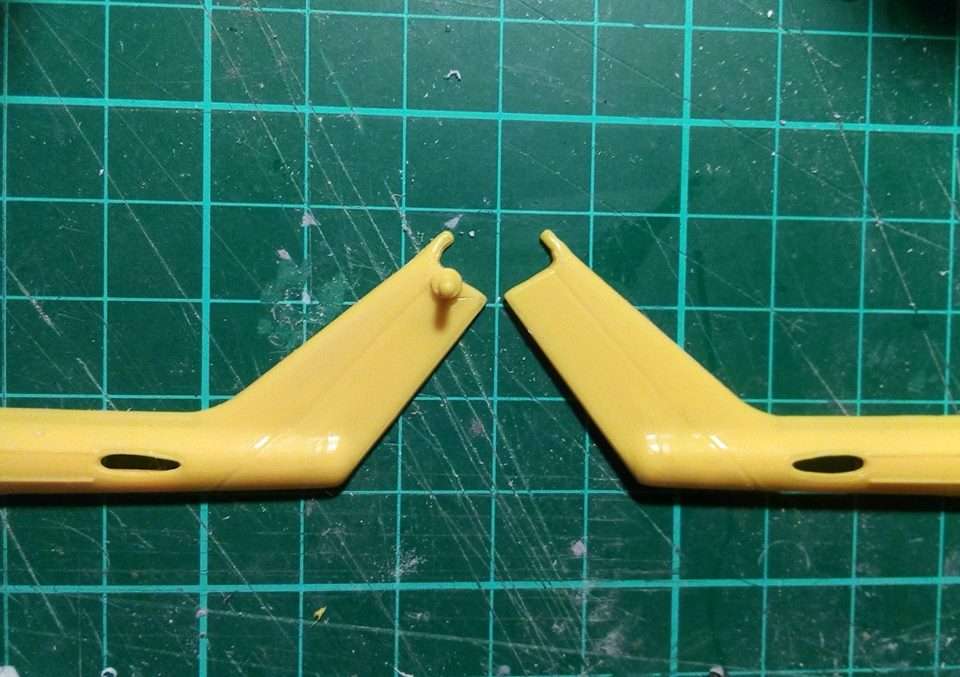
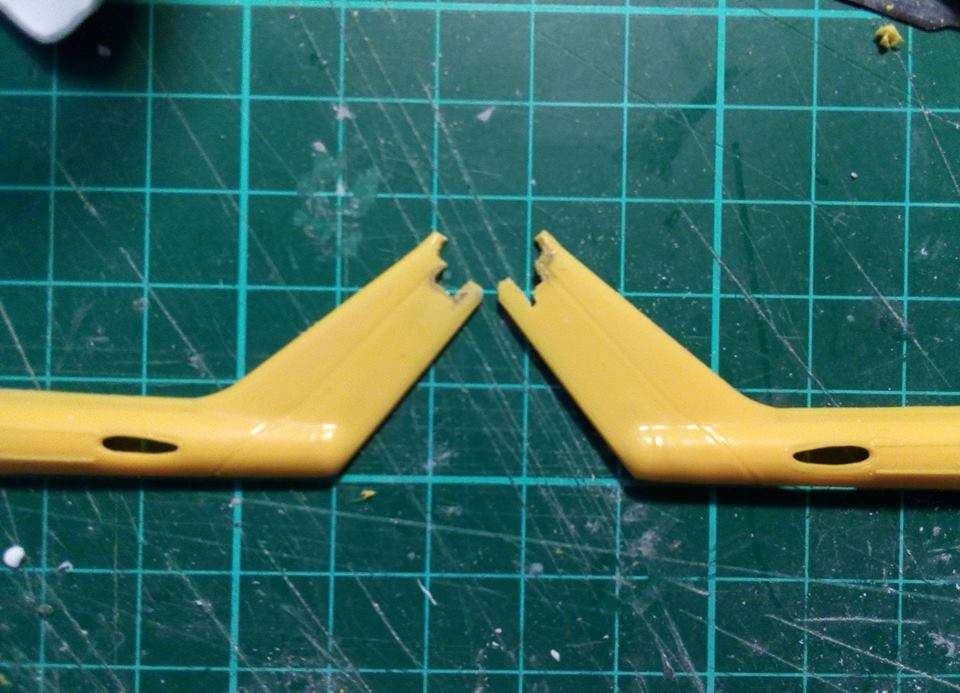
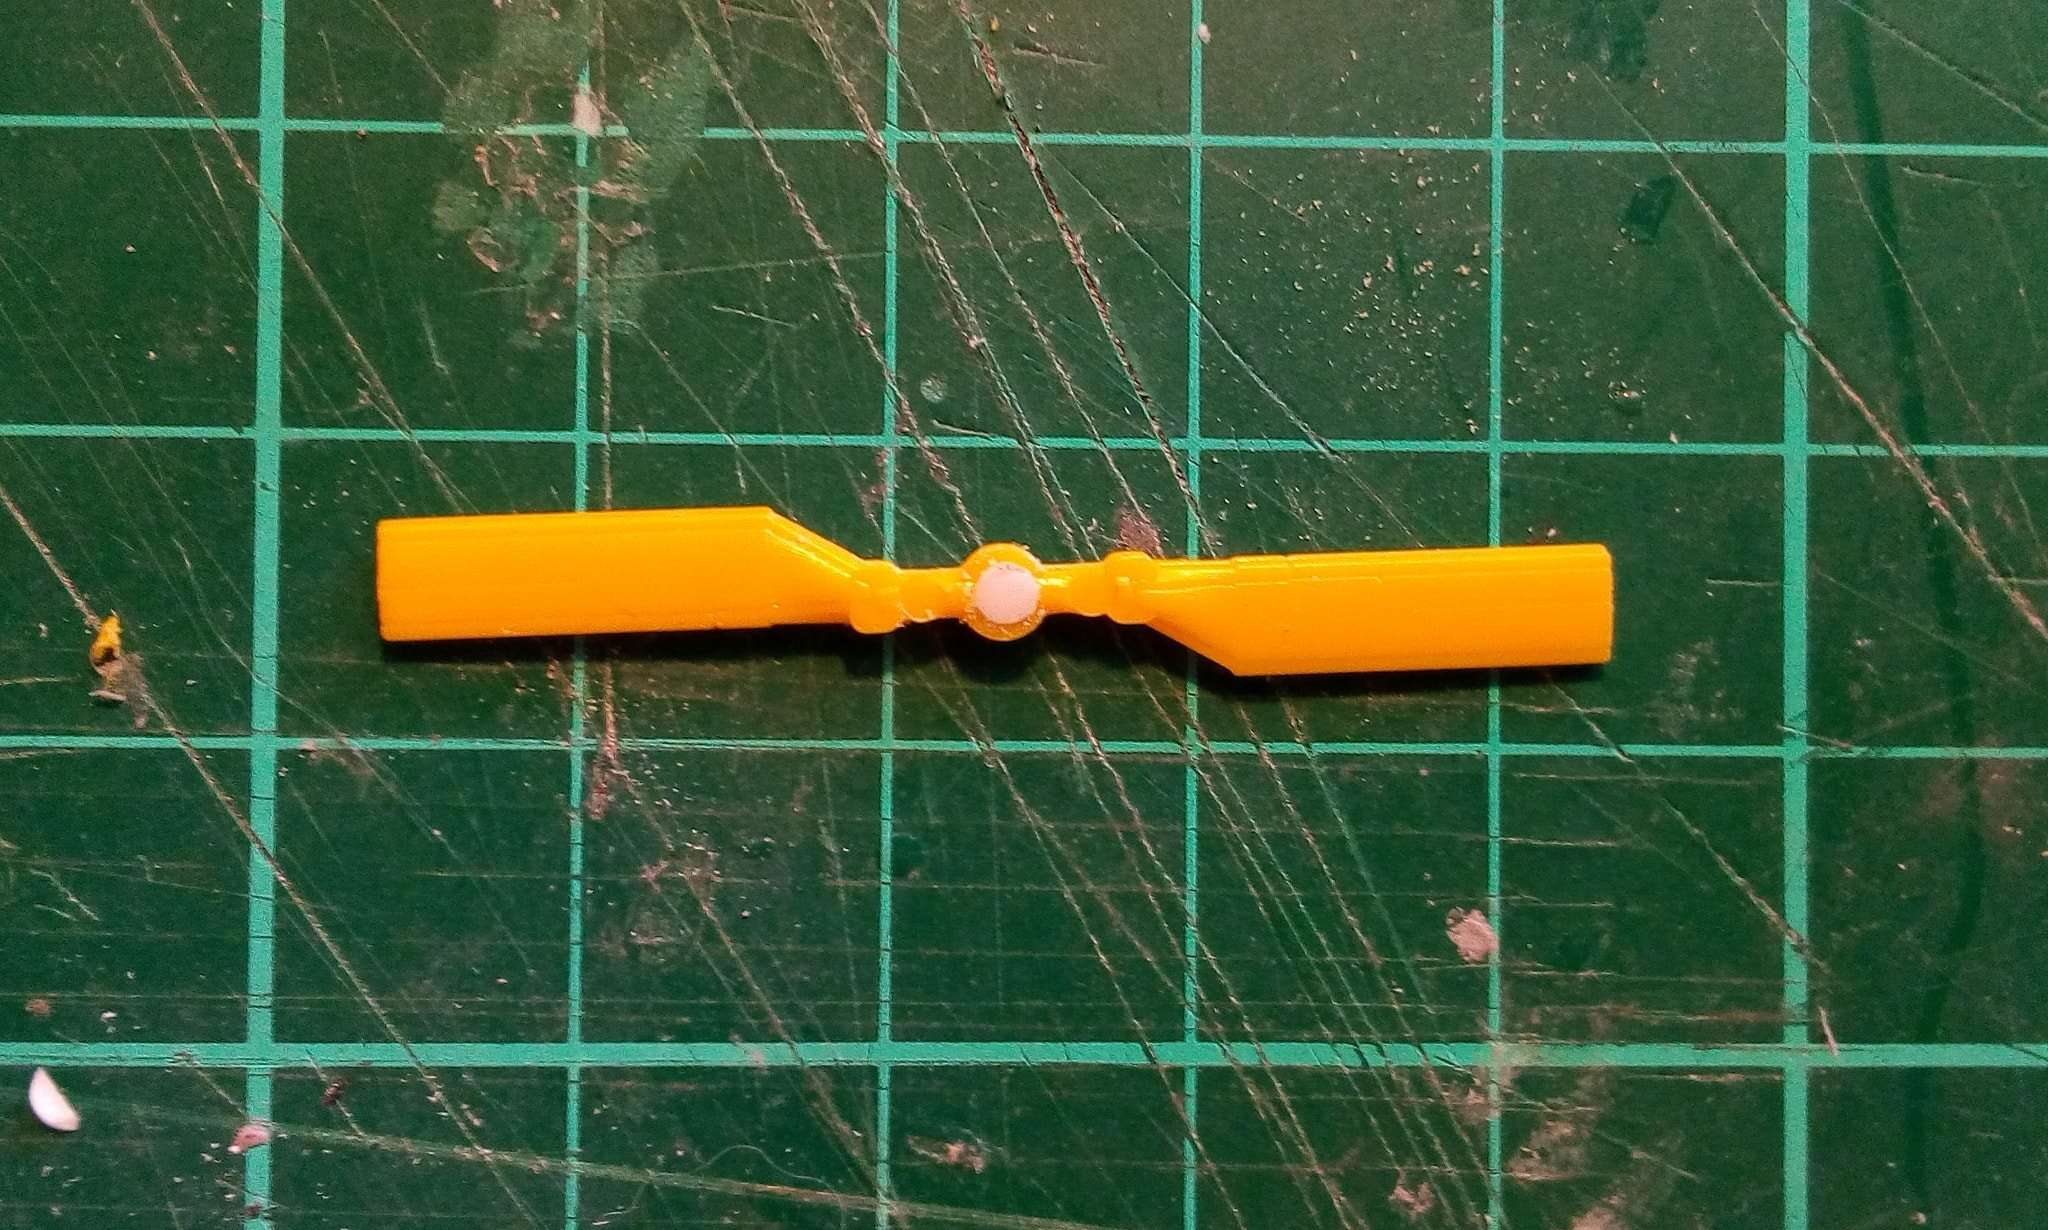
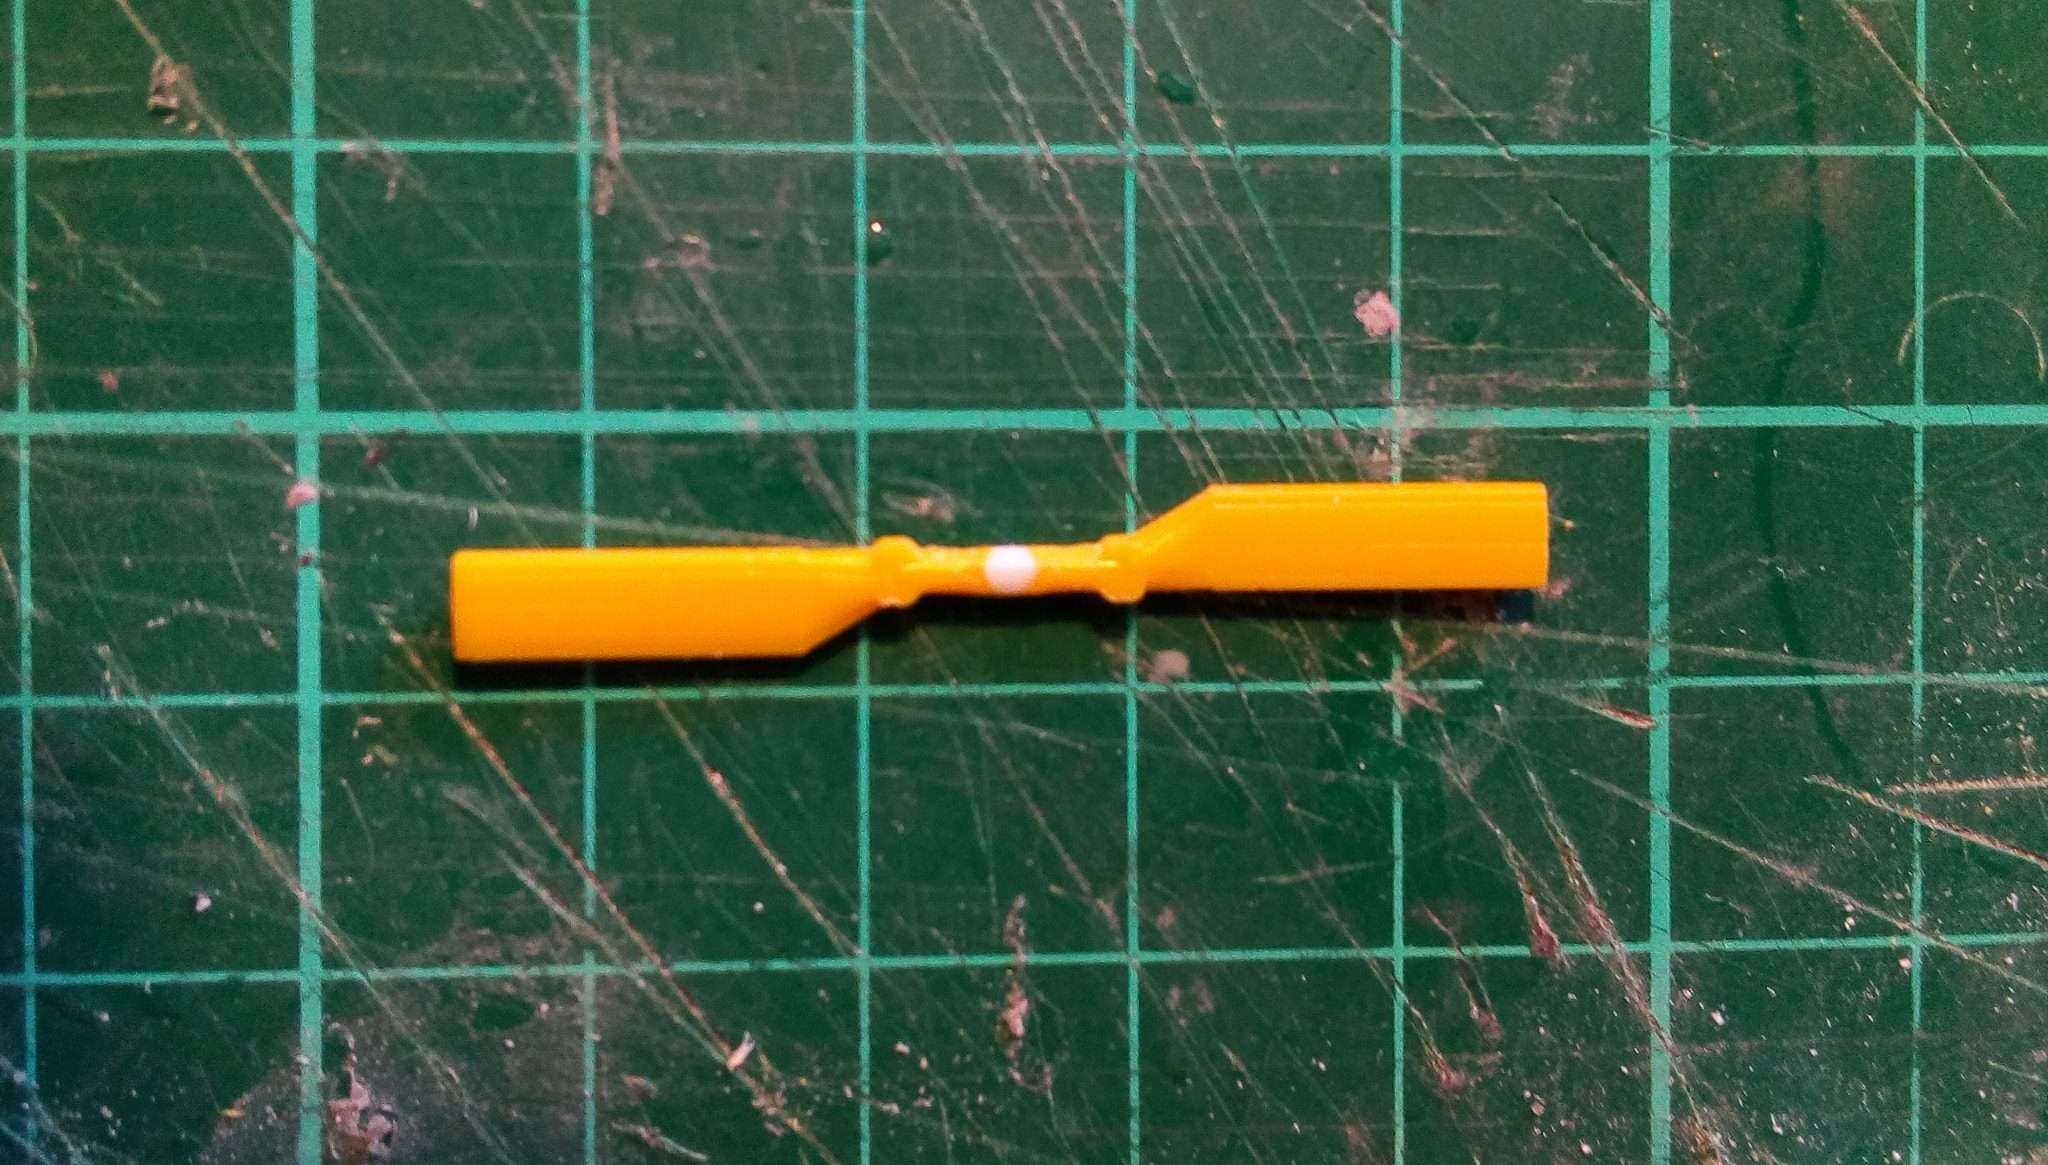
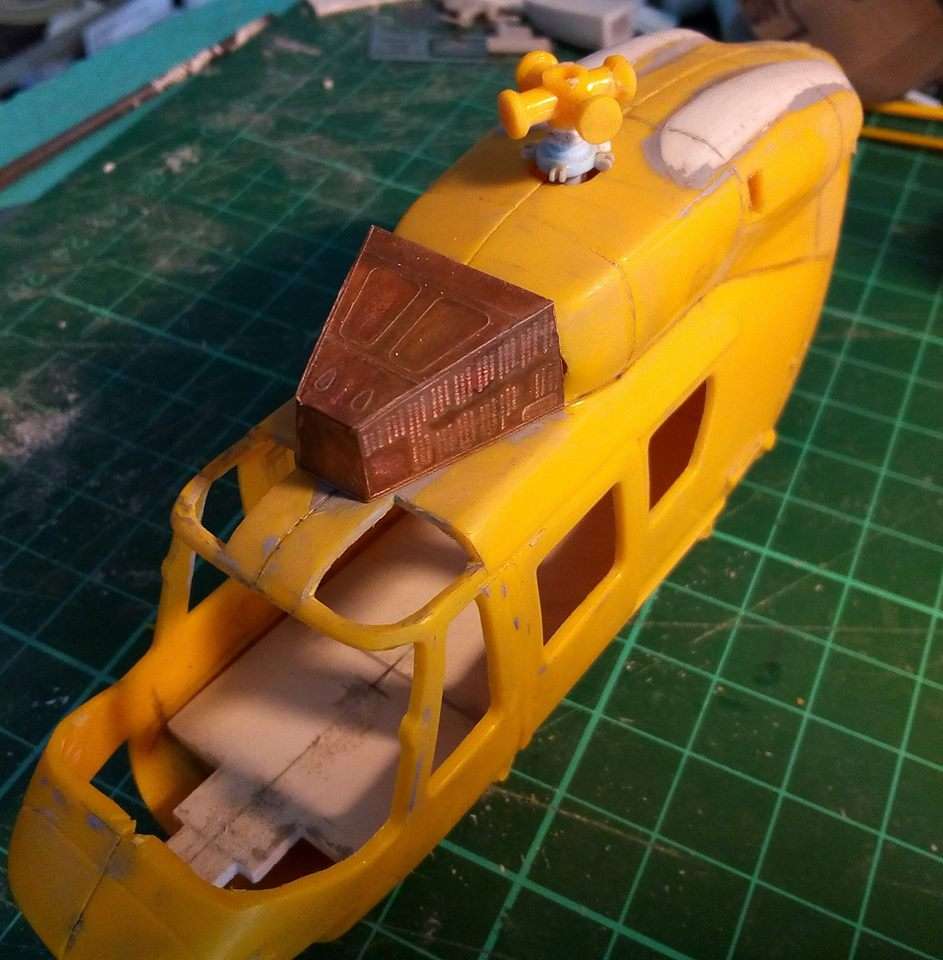
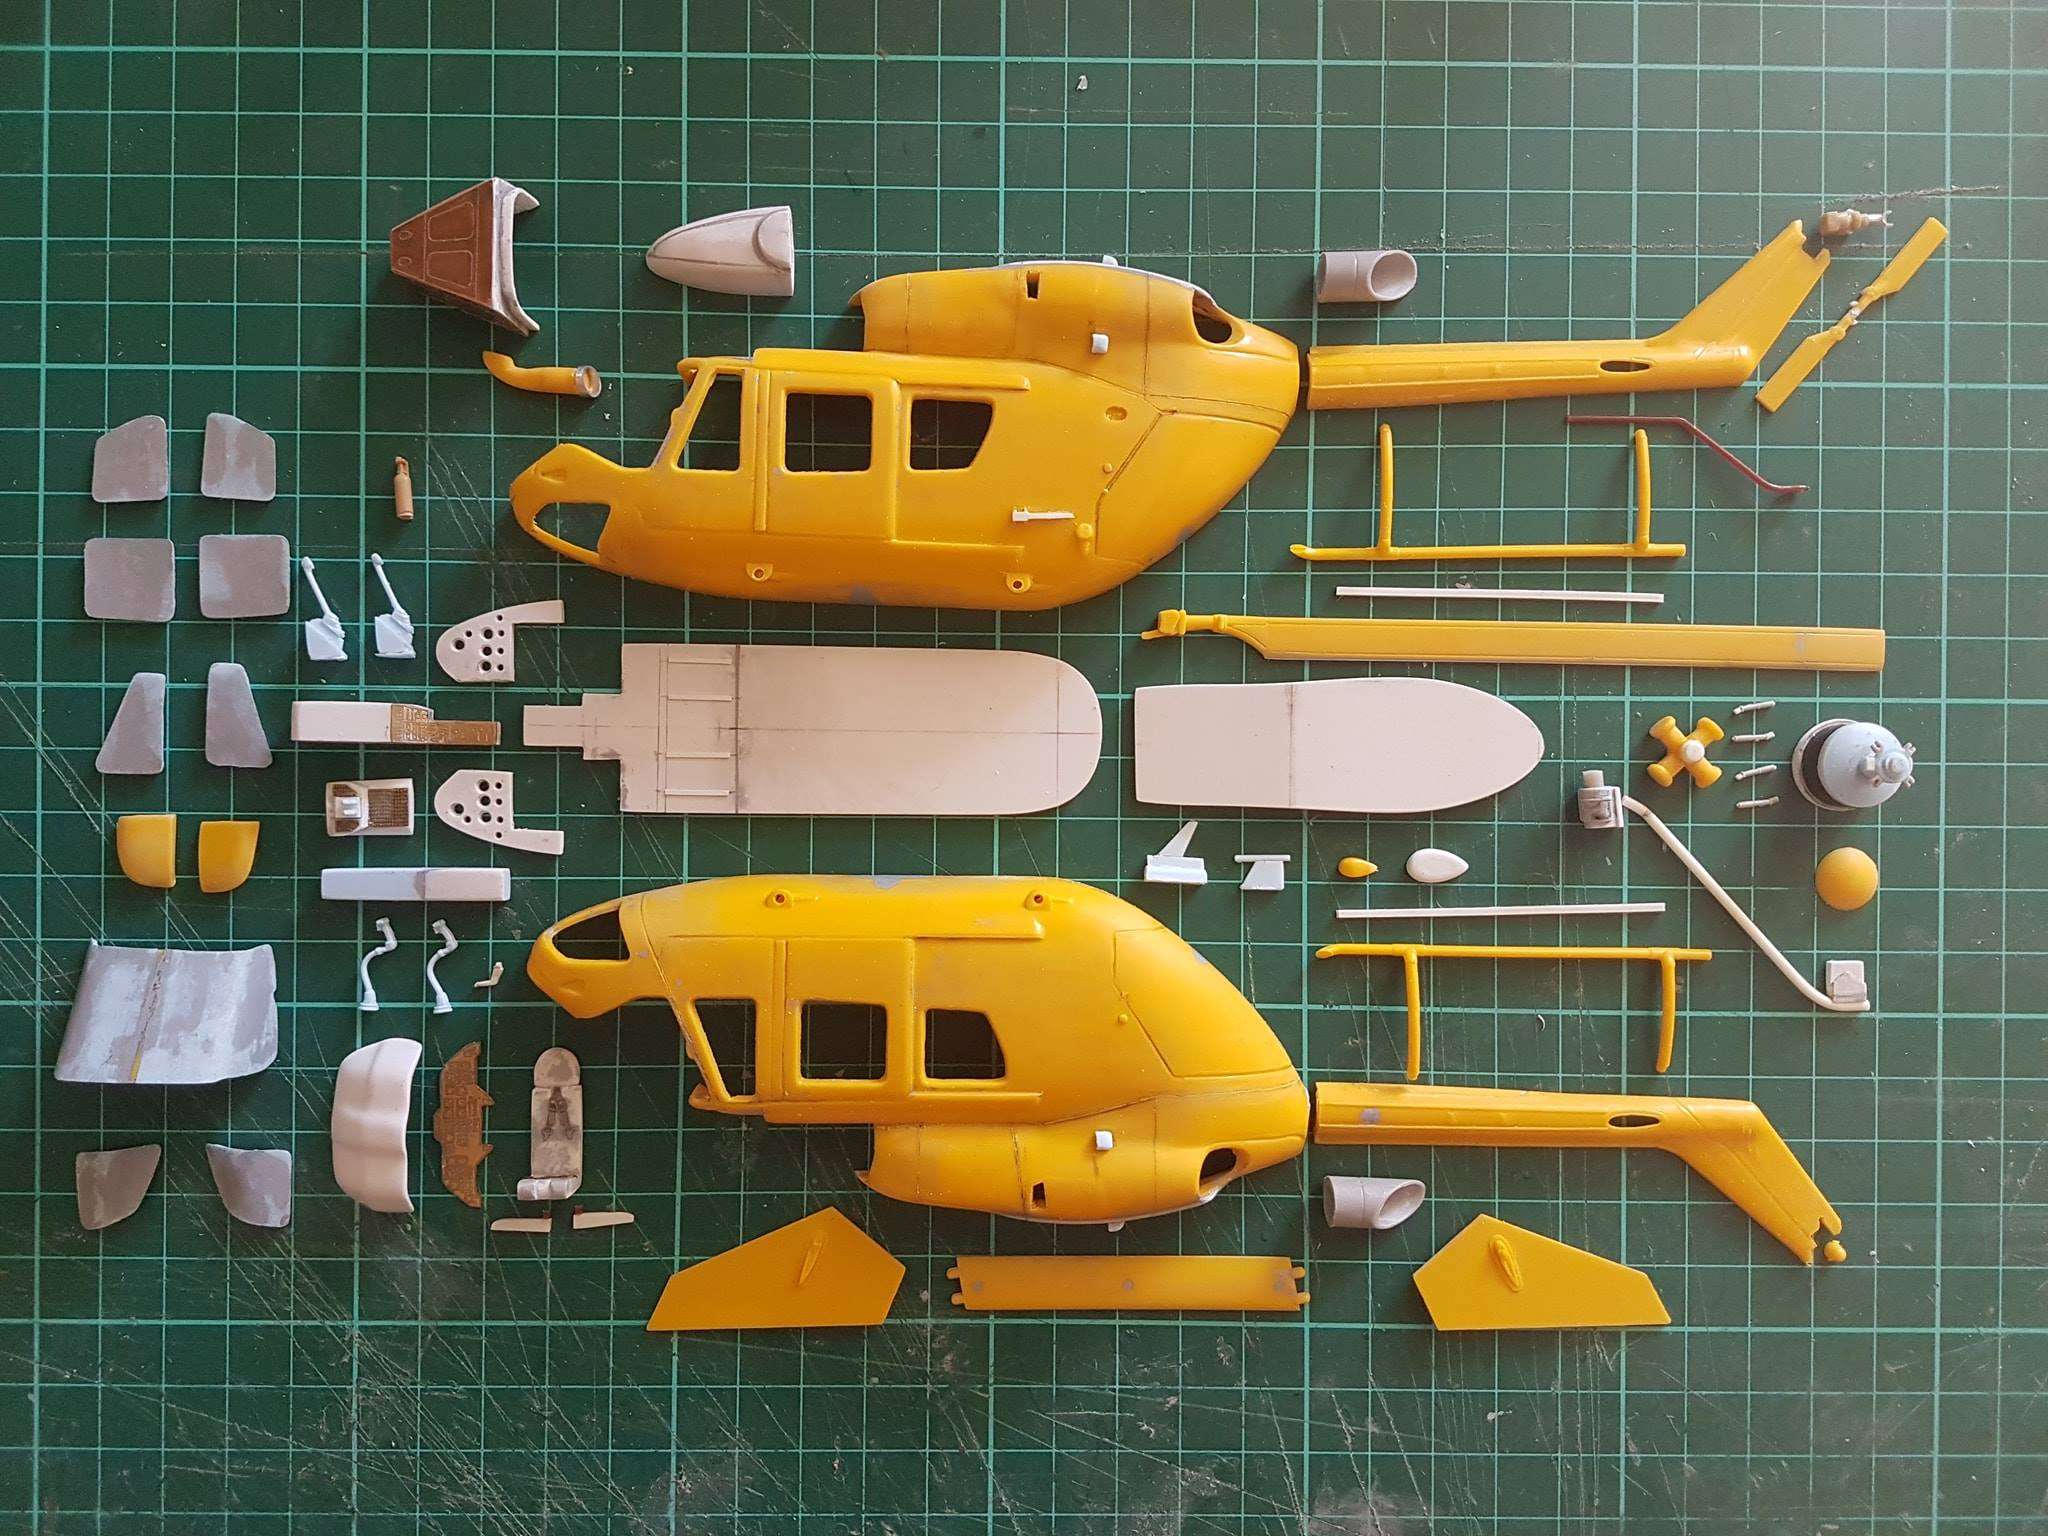
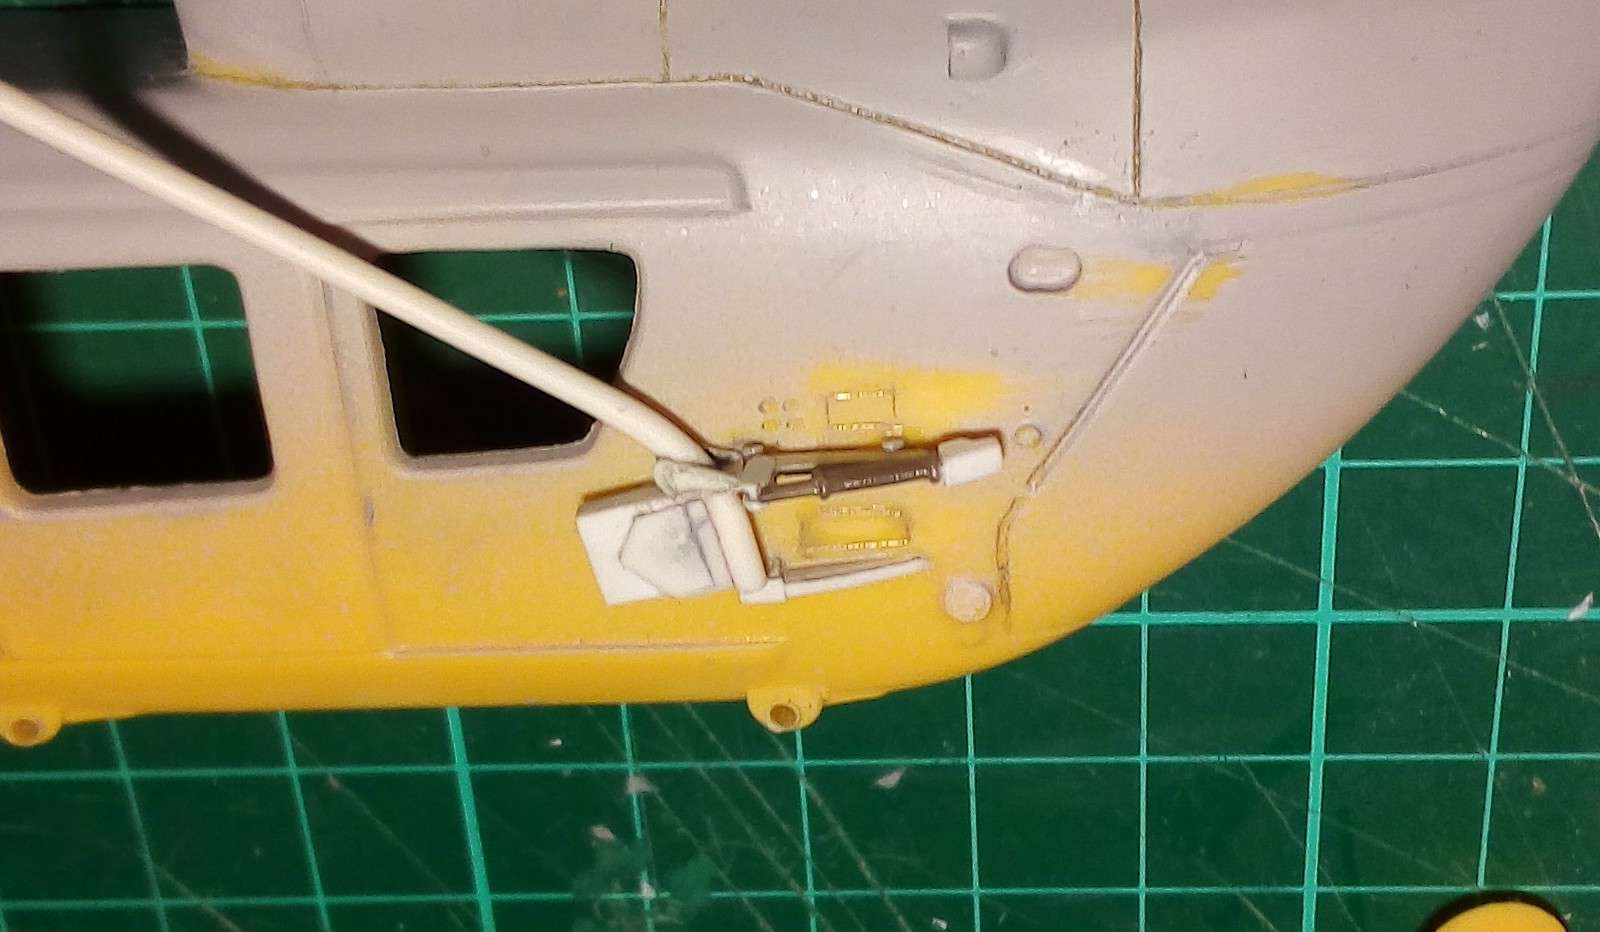
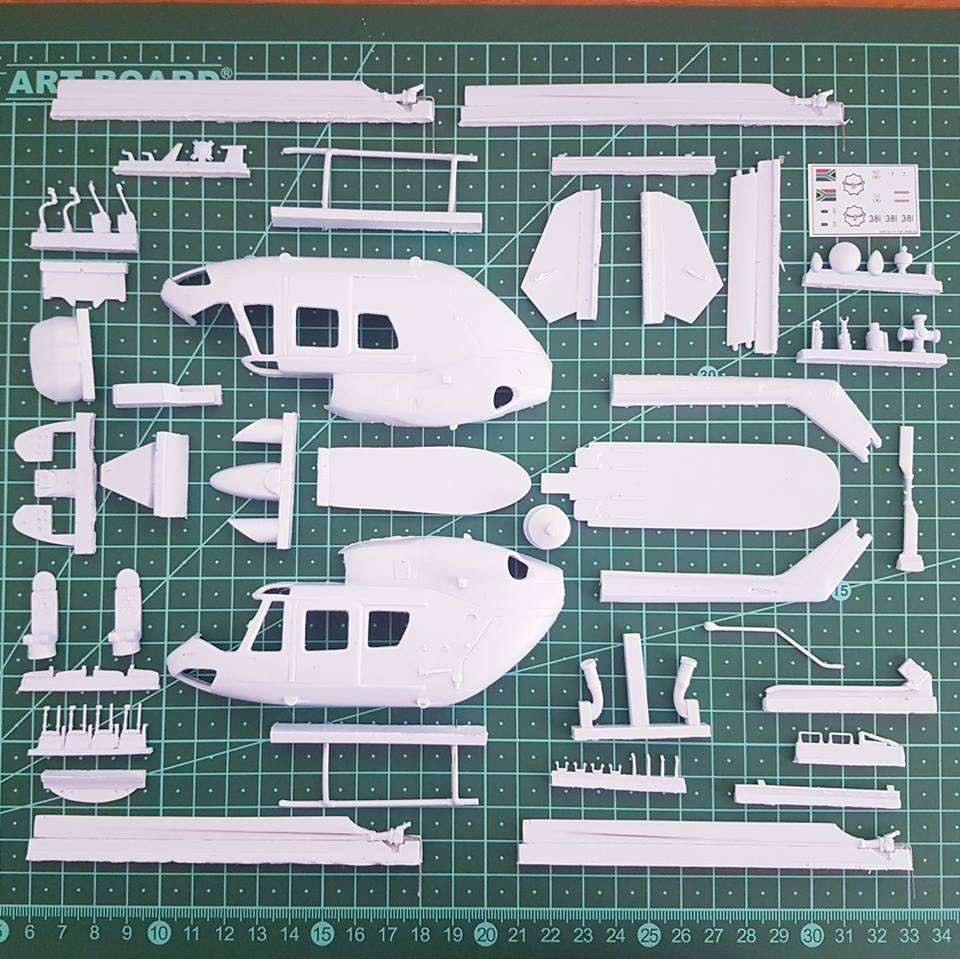
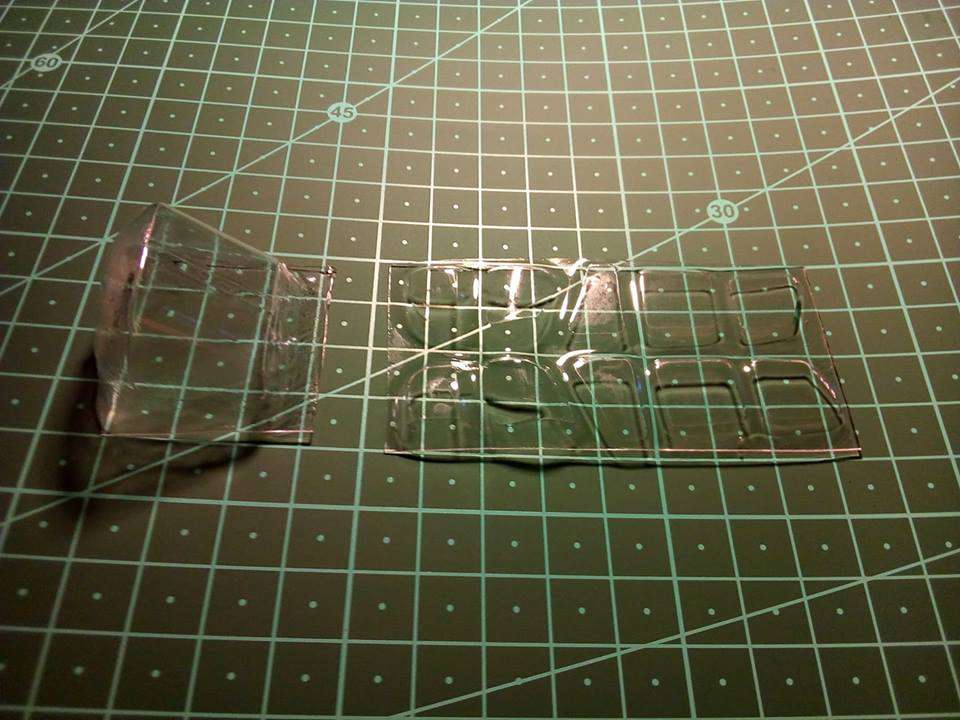
I started on refurbishing the ancient and extremely rare Revell Junior BK-117 snapkit recently. The kit is very basic and has no interior (besides two "couches") or clear parts. From what I could find out about the snapkit, is that they were apparently handed out at airshows to get children interested in building models. The fuselage dimensions are 1/48, making things a bit easier. Started with the floorboard, center console, instrument panel and cowl, and then realized that I better get the blanks done for the clear parts. These were made from resin and filler, but the overhead windows didn't feature, and had to be carefully cut out. Noticed that for the sake of simplifying the injection molding, the engine covers did not have the bulges, and the middle section was too high. Cut two slots on either side of the center line to lower it, and then added two strips of plastic card on top of the engine covers to shape the bulges. The intakes had to be opened up a bit, which brought another issue to light. The fairing that separates the intakes is too narrow and too rounded. This was cut out and a new one built from plastic card. The main rotor blades are 12.5mm too short, and the chord just a fraction short. Lengthened one blade with a section of another to use as a master. Also added a thin strip to the trailing edge, of which most will be sanded down to adjust the chord.

Image

Image

Image

Image

Image

Image

Image

Image

Image

Image

Image

Image

Image


Cheers, John

_________________
www.facebook.com/scaleworx


Top
 Profile  
Reply with quote  
PostPosted: 29 Nov 2018, 20:39 
Offline
User avatar

Joined: 01 Feb 2010, 18:06
Posts: 1033
While the tumbleweed rolls by... another boring update.

Image

Image

Image

_________________
www.facebook.com/scaleworx


Top
 Profile  
Reply with quote  
PostPosted: 29 Nov 2018, 22:06 
Offline

Joined: 22 Oct 2005, 05:47
Posts: 311
Hey John,

Bladerunner wrote:
Started with the floorboard, center console, instrument panel and cowl, and then realized that I better get the blanks done for the clear parts. These were made from resin and filler, but the overhead windows didn't feature, and had to be carefully cut out.


Are you not perhaps missing a set of windows for the clamshell doors?

- SAAF BK-117 Clamshell Door 01
- SAAF BK-117 Clamshell Door 02

Regards,
Stratobat

_________________
'If the literal sense makes good sense, seek no other sense lest you come up with nonsense'


Top
 Profile  
Reply with quote  
PostPosted: 29 Nov 2018, 22:24 
Offline
User avatar

Joined: 01 Feb 2010, 18:06
Posts: 1033
Stratobat, I'm not making the late version, hence no clamshell door windows :wink:

Cheers,
John

_________________
www.facebook.com/scaleworx


Top
 Profile  
Reply with quote  
PostPosted: 01 Dec 2018, 15:55 
Offline

Joined: 22 Oct 2005, 05:47
Posts: 311
Hey John,

Any plans for a late version down the road?

Regards,
Stratobat

_________________
'If the literal sense makes good sense, seek no other sense lest you come up with nonsense'


Top
 Profile  
Reply with quote  
PostPosted: 01 Dec 2018, 16:53 
Offline
User avatar

Joined: 01 Feb 2010, 18:06
Posts: 1033
Hi Stratobat,

No plans for the late variants at this stage. Not as popular as the older ones. It would also mean modifying the masters and adding vac-form parts. This would also require the late model airfilter, which will add to the production costs.

Cheers,
John

_________________
www.facebook.com/scaleworx


Top
 Profile  
Reply with quote  
PostPosted: 02 Dec 2018, 10:27 
Offline
User avatar

Joined: 01 Feb 2010, 18:06
Posts: 1033
Got the engine deck, basic gearbox and swashplate done.
Tail fin and tail rotor also being modified. Some before and after pics.

Image

Image

Image

Image

Image

Cheers,
John

_________________
www.facebook.com/scaleworx


Top
 Profile  
Reply with quote  
PostPosted: 02 Dec 2018, 11:02 
Offline
User avatar

Joined: 01 Feb 2010, 18:06
Posts: 1033
Image

_________________
www.facebook.com/scaleworx


Top
 Profile  
Reply with quote  
PostPosted: 05 Dec 2018, 19:08 
Offline
User avatar

Joined: 01 Feb 2010, 18:06
Posts: 1033
Image

_________________
www.facebook.com/scaleworx


Top
 Profile  
Reply with quote  
PostPosted: 20 Dec 2018, 00:21 
Offline
User avatar

Joined: 01 Feb 2010, 18:06
Posts: 1033
Oops, almost forgot to post a pic of the hoist mechanism, resin parts and the vac-form clear parts #-o

Image

Image

Image

Cheers,
John

_________________
www.facebook.com/scaleworx


Top
 Profile  
Reply with quote  
PostPosted: 20 Dec 2018, 10:13 
Offline

Joined: 22 Oct 2005, 05:47
Posts: 311
Hey John,

Looking very nice 8)

Regards,
Stratobat

_________________
'If the literal sense makes good sense, seek no other sense lest you come up with nonsense'


Top
 Profile  
Reply with quote  
PostPosted: 20 Dec 2018, 18:29 
Offline
User avatar

Joined: 01 Feb 2010, 18:06
Posts: 1033
Thanks Stratobat ;)
Also appreciated your comments during the build :)

Cheers,
John

_________________
www.facebook.com/scaleworx


Top
 Profile  
Reply with quote  
PostPosted: 23 Dec 2018, 16:14 
Offline

Joined: 22 Oct 2005, 05:47
Posts: 311
Hi John,

Bladerunner wrote:
Also appreciated your comments during the build :)

I enjoy watching your projects take shape - I always learn something new :smt023

Regards,
Stratobat

_________________
'If the literal sense makes good sense, seek no other sense lest you come up with nonsense'


Top
 Profile  
Reply with quote  
PostPosted: 30 Dec 2018, 17:27 
Offline
User avatar

Joined: 01 Feb 2010, 18:06
Posts: 1033
Thanks man, feedback is vital, as it's helps shape the end result to be closer to what the guys would expect from the kit :smt023

_________________
www.facebook.com/scaleworx


Top
 Profile  
Reply with quote  
PostPosted: 30 Dec 2018, 21:09 
Offline

Joined: 31 Aug 2010, 15:01
Posts: 4908
Location: Centurion, Pretoria, SA
That's looking great John :D :smt023 . I muddled my way through the Revell 32nd one a few years ago. You've put way more effort into making yours correct for a SAAF bird.


Top
 Profile  
Reply with quote  
Display posts from previous:  Sort by  
Post new topic Reply to topic  [ 16 posts ]  Go to page 1, 2  Next

All times are UTC + 2 hours


Who is online

Users browsing this forum: No registered users and 55 guests


You cannot post new topics in this forum
You cannot reply to topics in this forum
You cannot edit your posts in this forum
You cannot delete your posts in this forum

Search for:
Jump to:  
cron
Powered by phpBB® Forum Software © phpBB Group